A few snaps of the large coat from the last post actually being worn in the wild. Keen eyed viewers will spot the blue jump coat which is also part of the impression designed for the Aston’s Dragoones and which we designed and made for them. It’s good to see our clothes come to life, though a little patina of mud and horse muck will improve the look even more!
A Large Coat
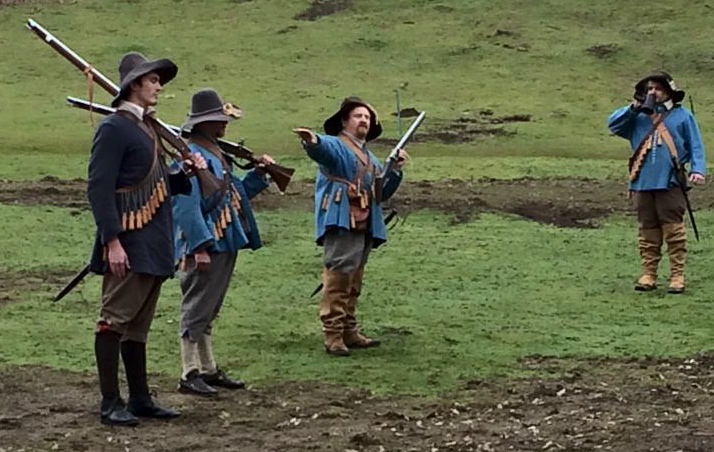
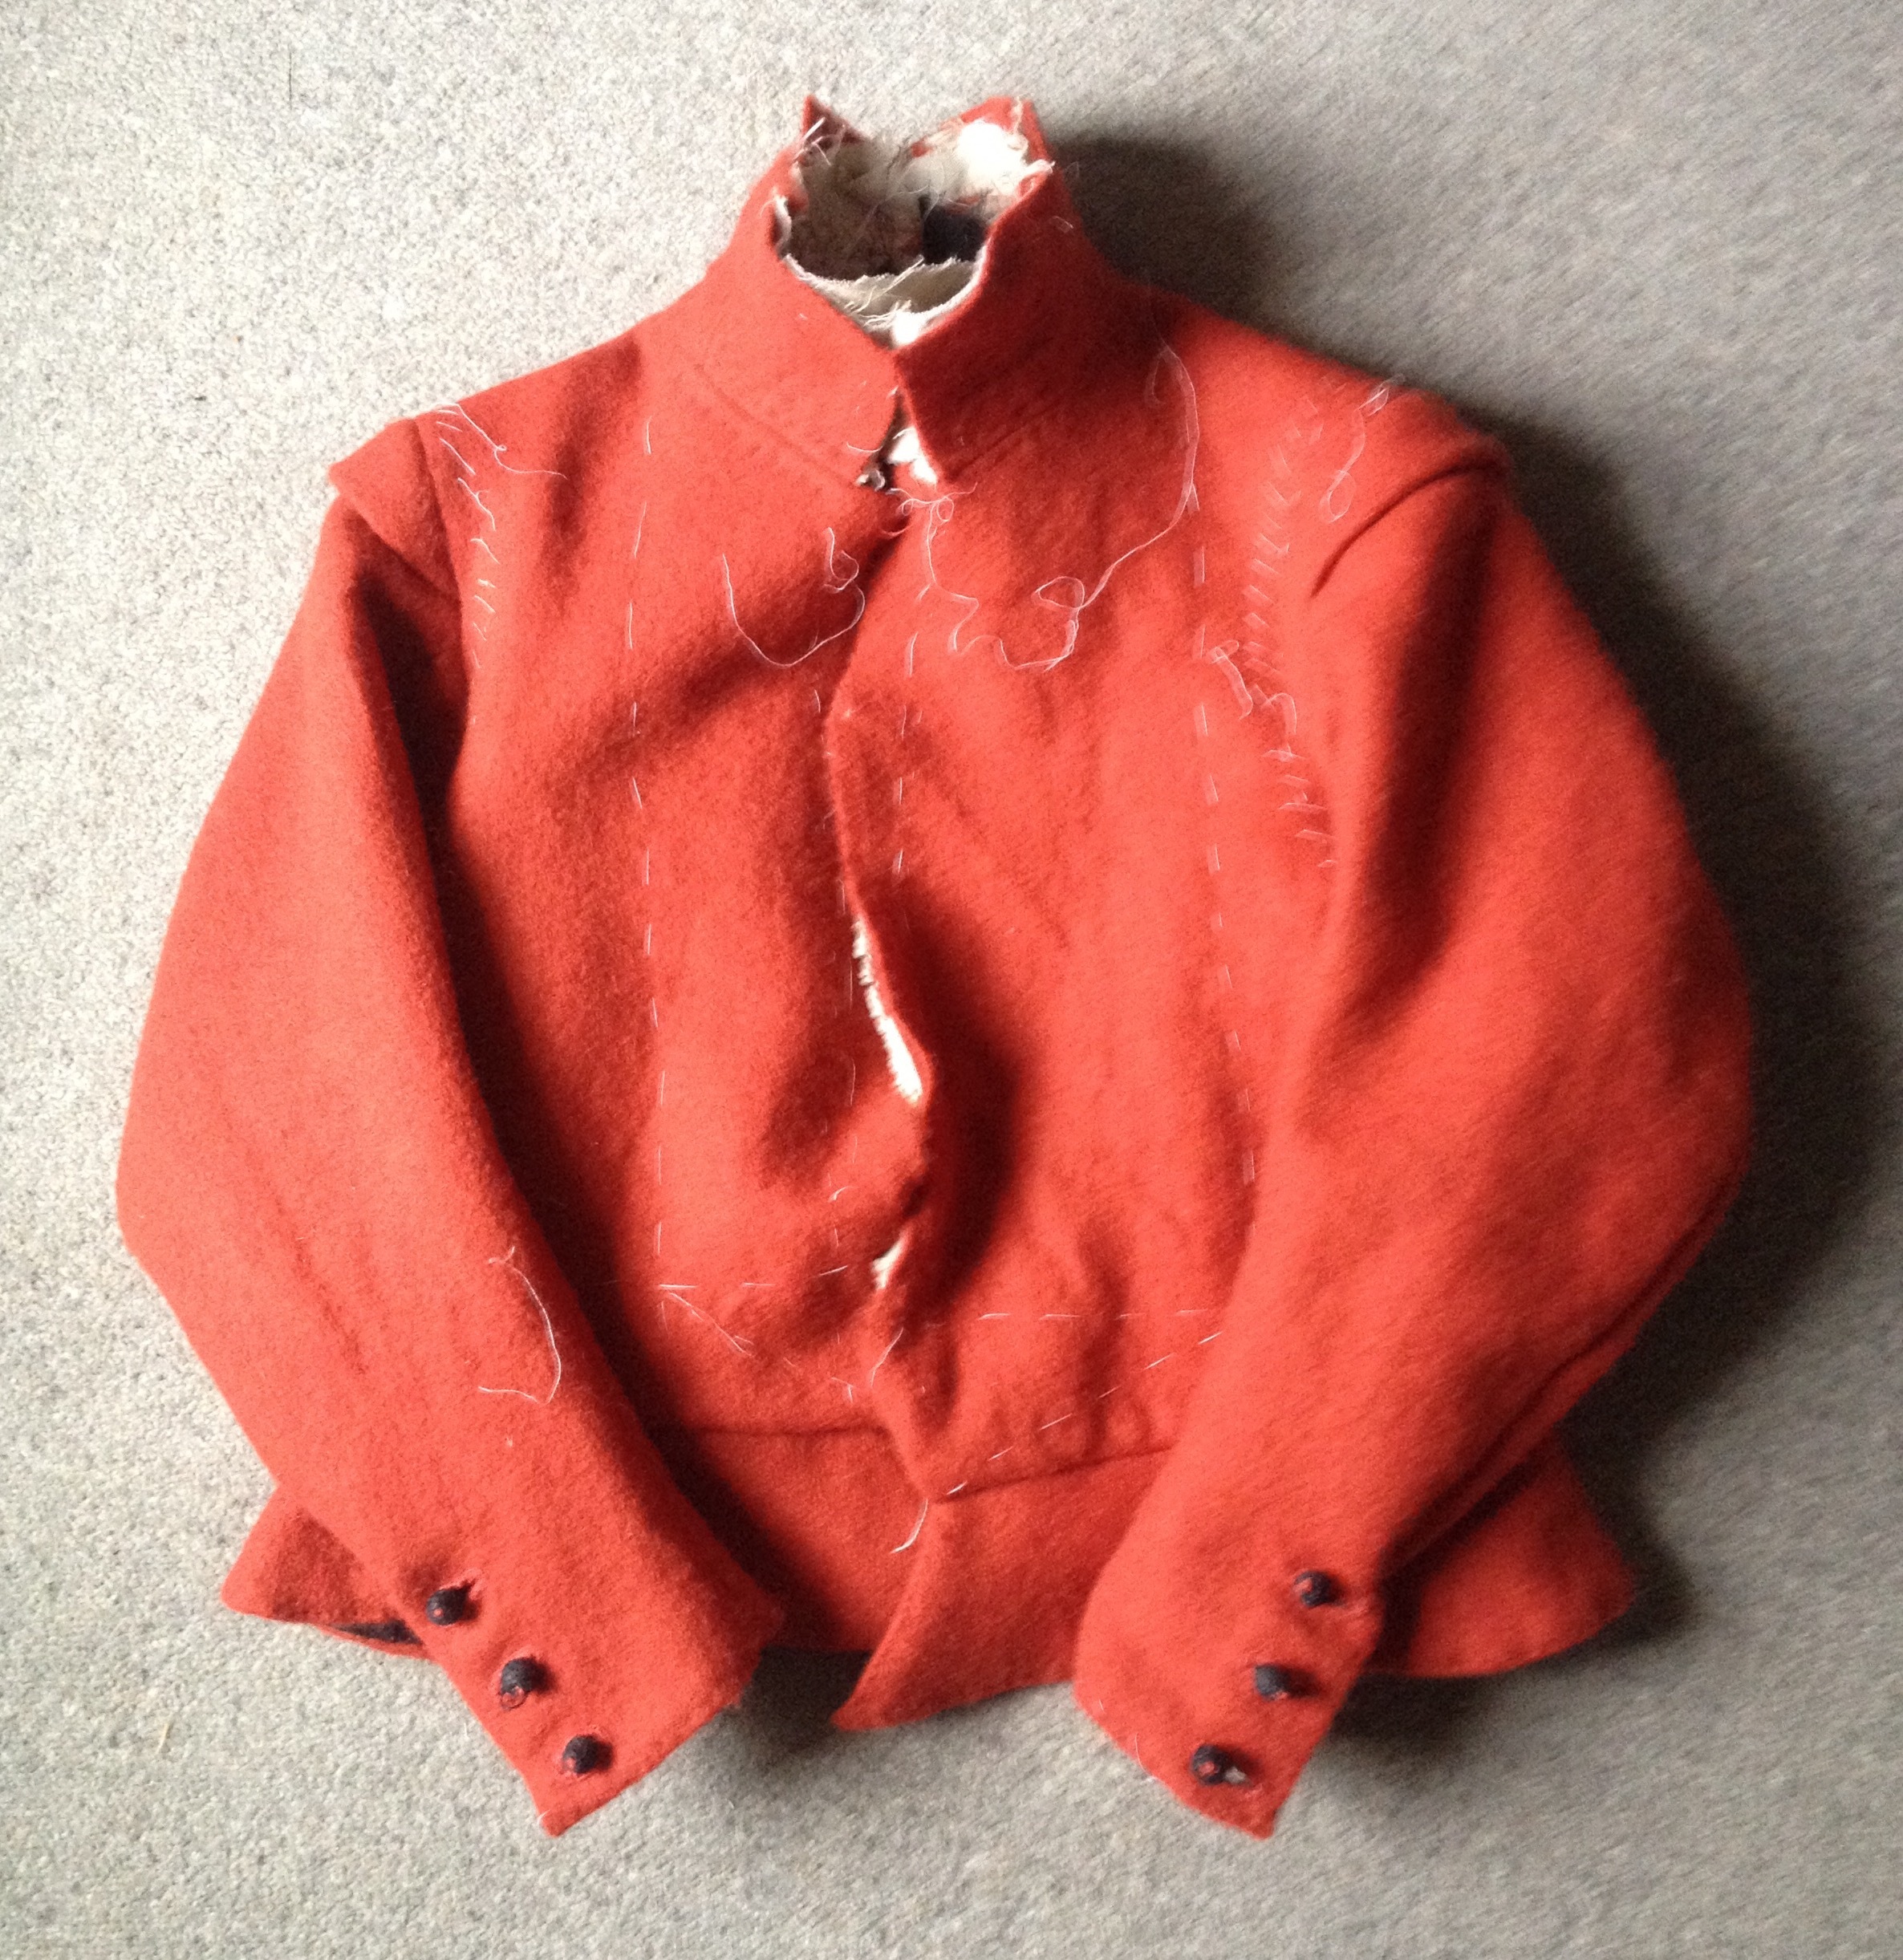
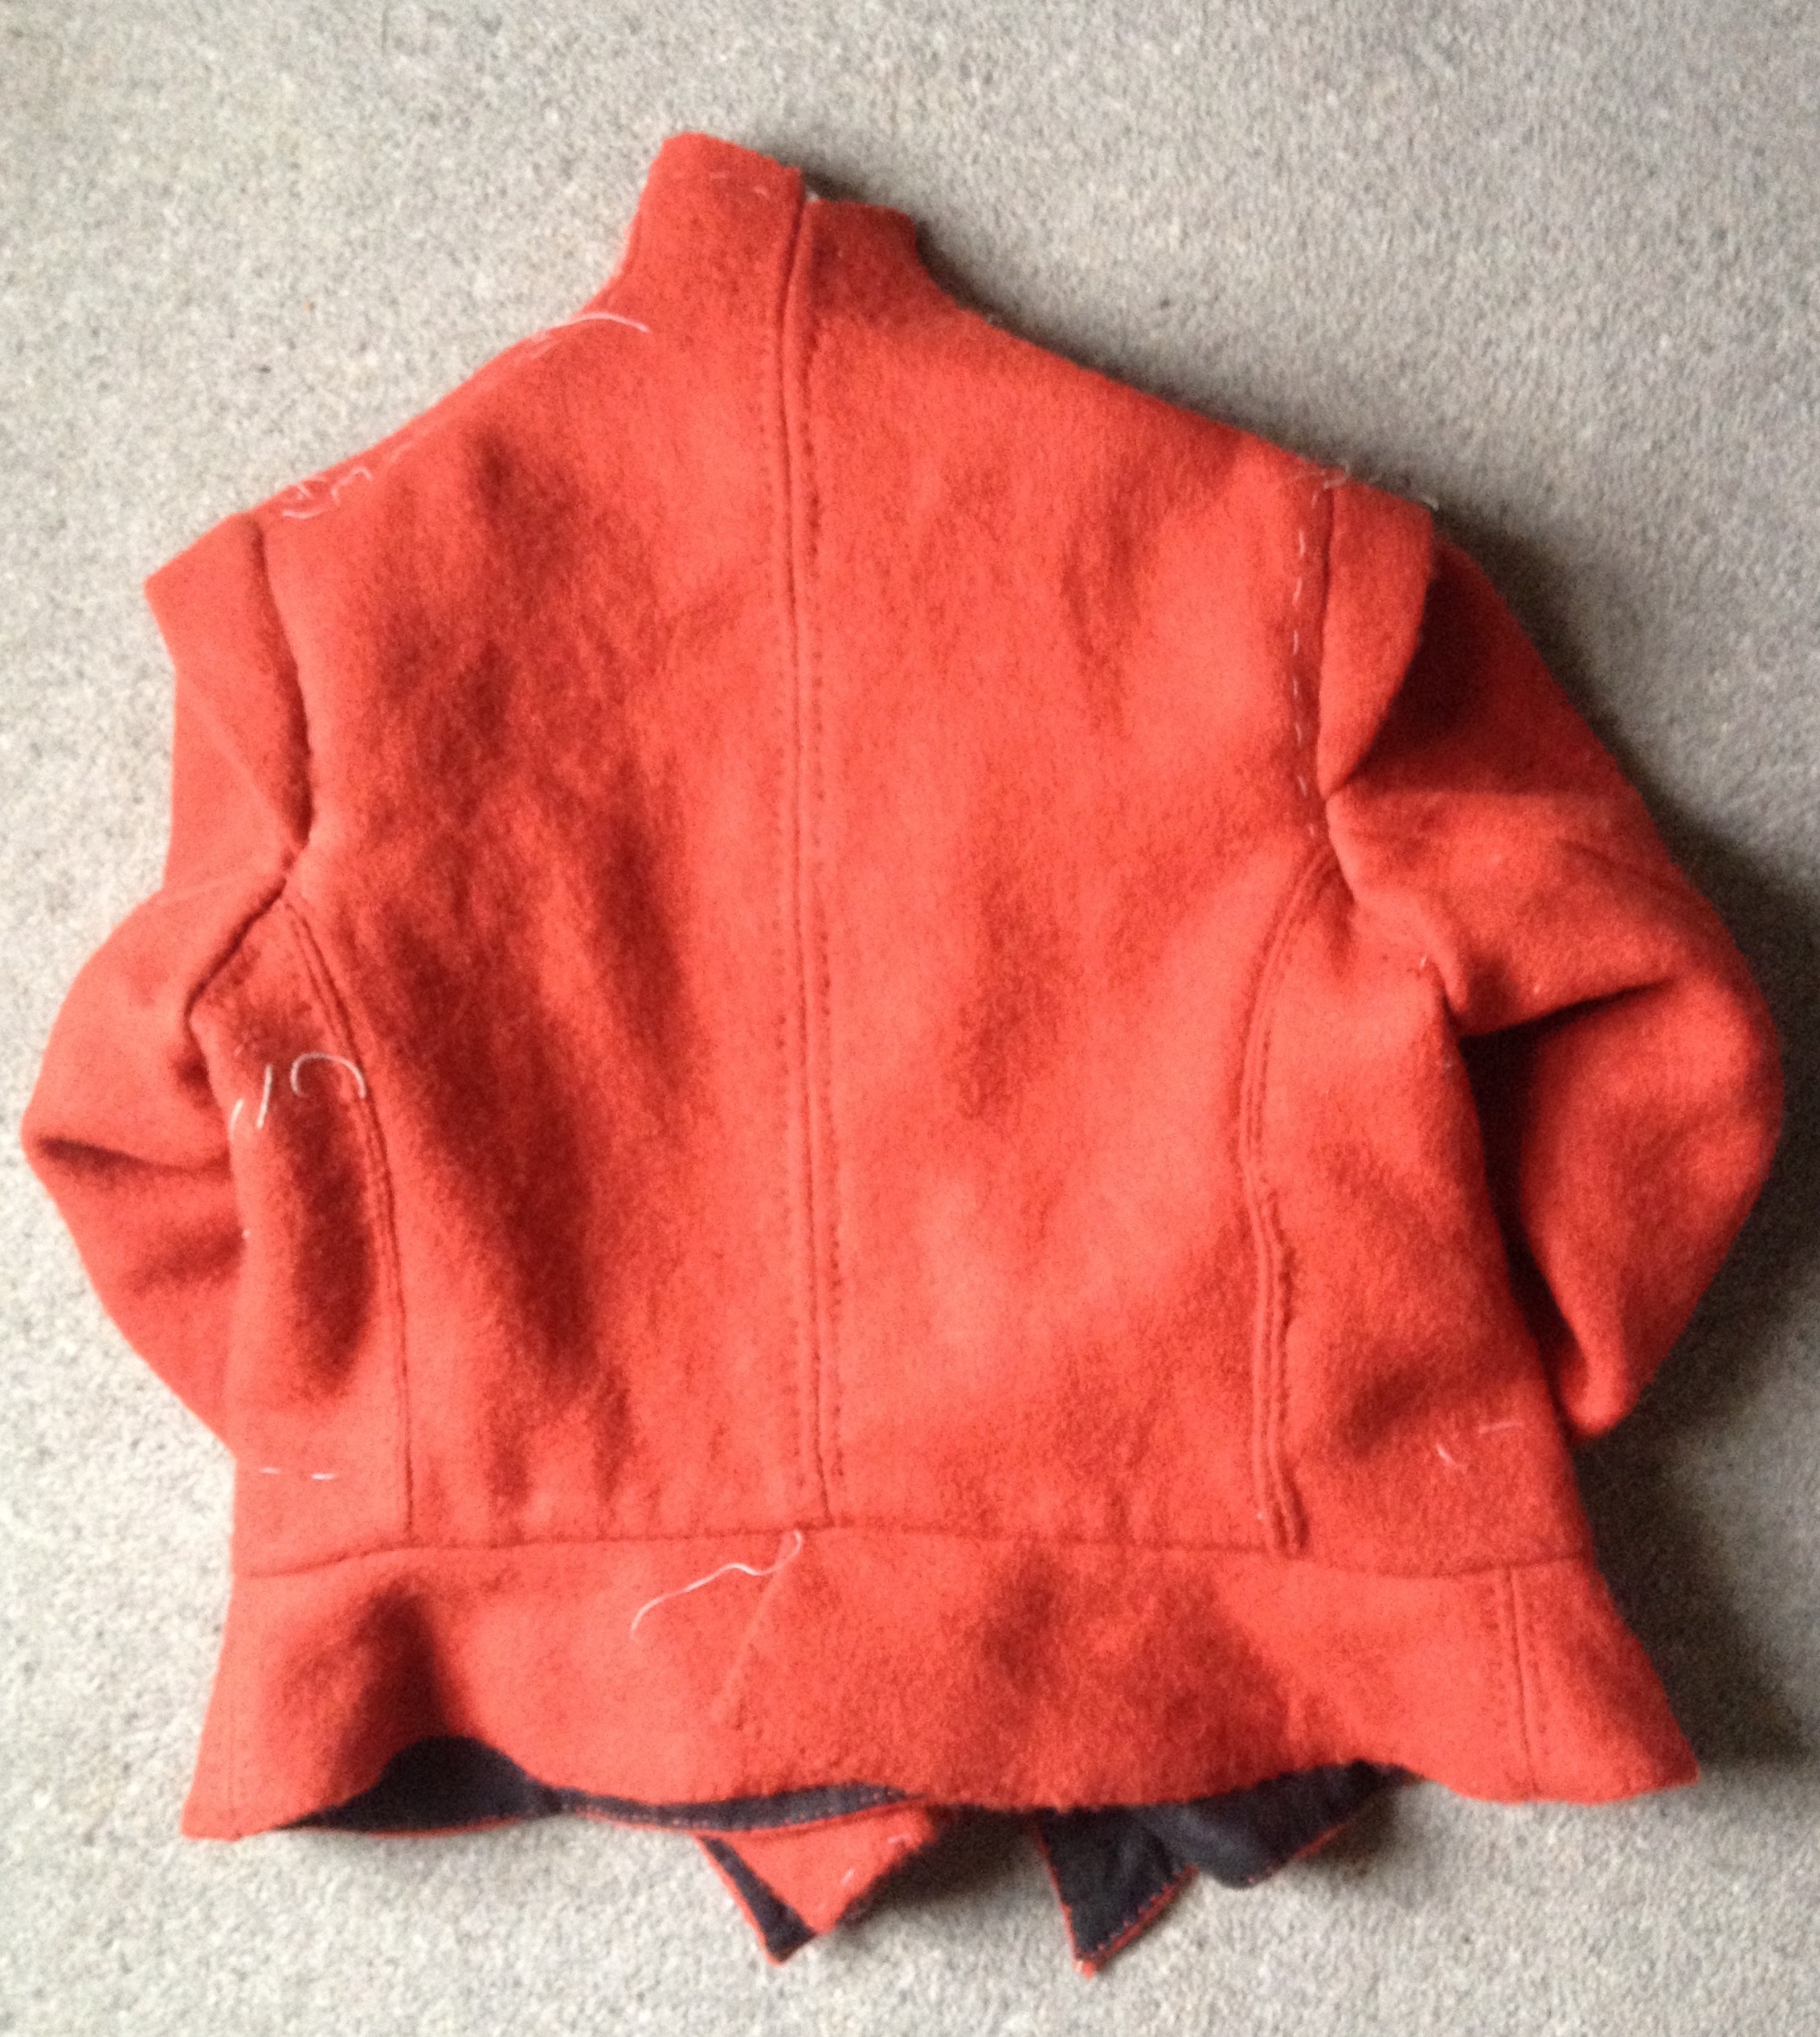
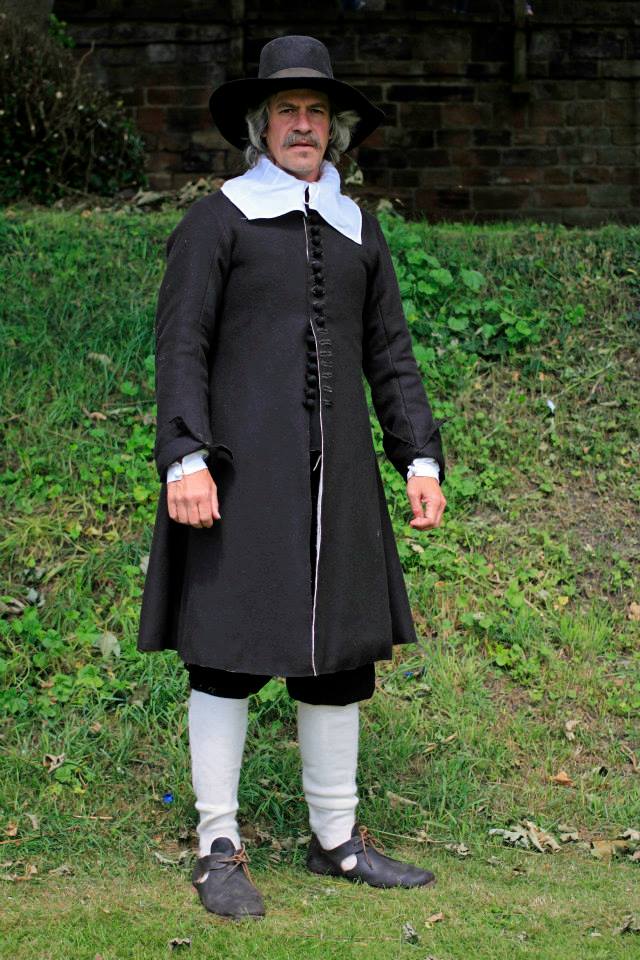
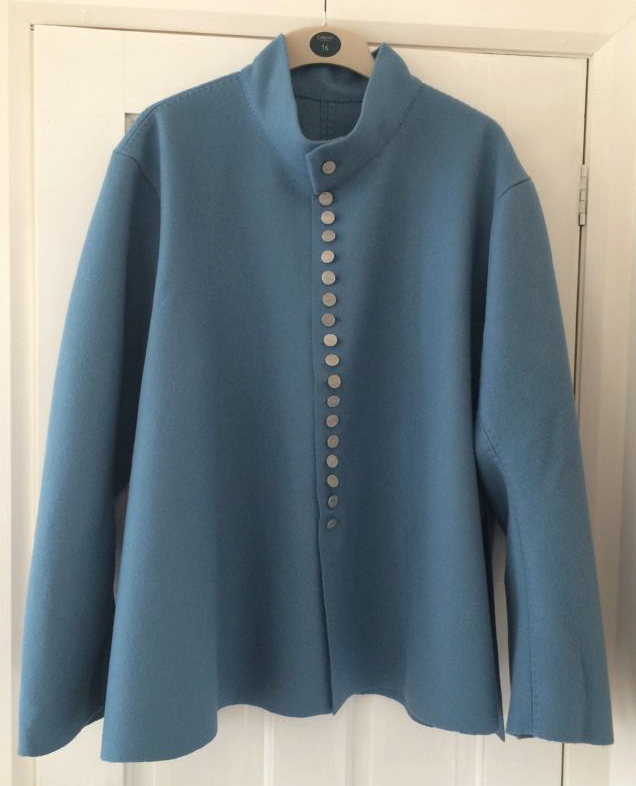
Fresh from the workroom, this is a large cavalry or dragoon trooper’s coat made to the specifications contained within a set of papers that have come to light for a Royalist cavalry regiment under Sir Thomas Aston. The troopers were all given a ‘large’ coat to go over their doublets and short jump coats and the accounts list the materials purchased for their construction in the early part of 1643. This is the first large coat for Aston’s Dragooners and will go over the blue jump coats we have already made.
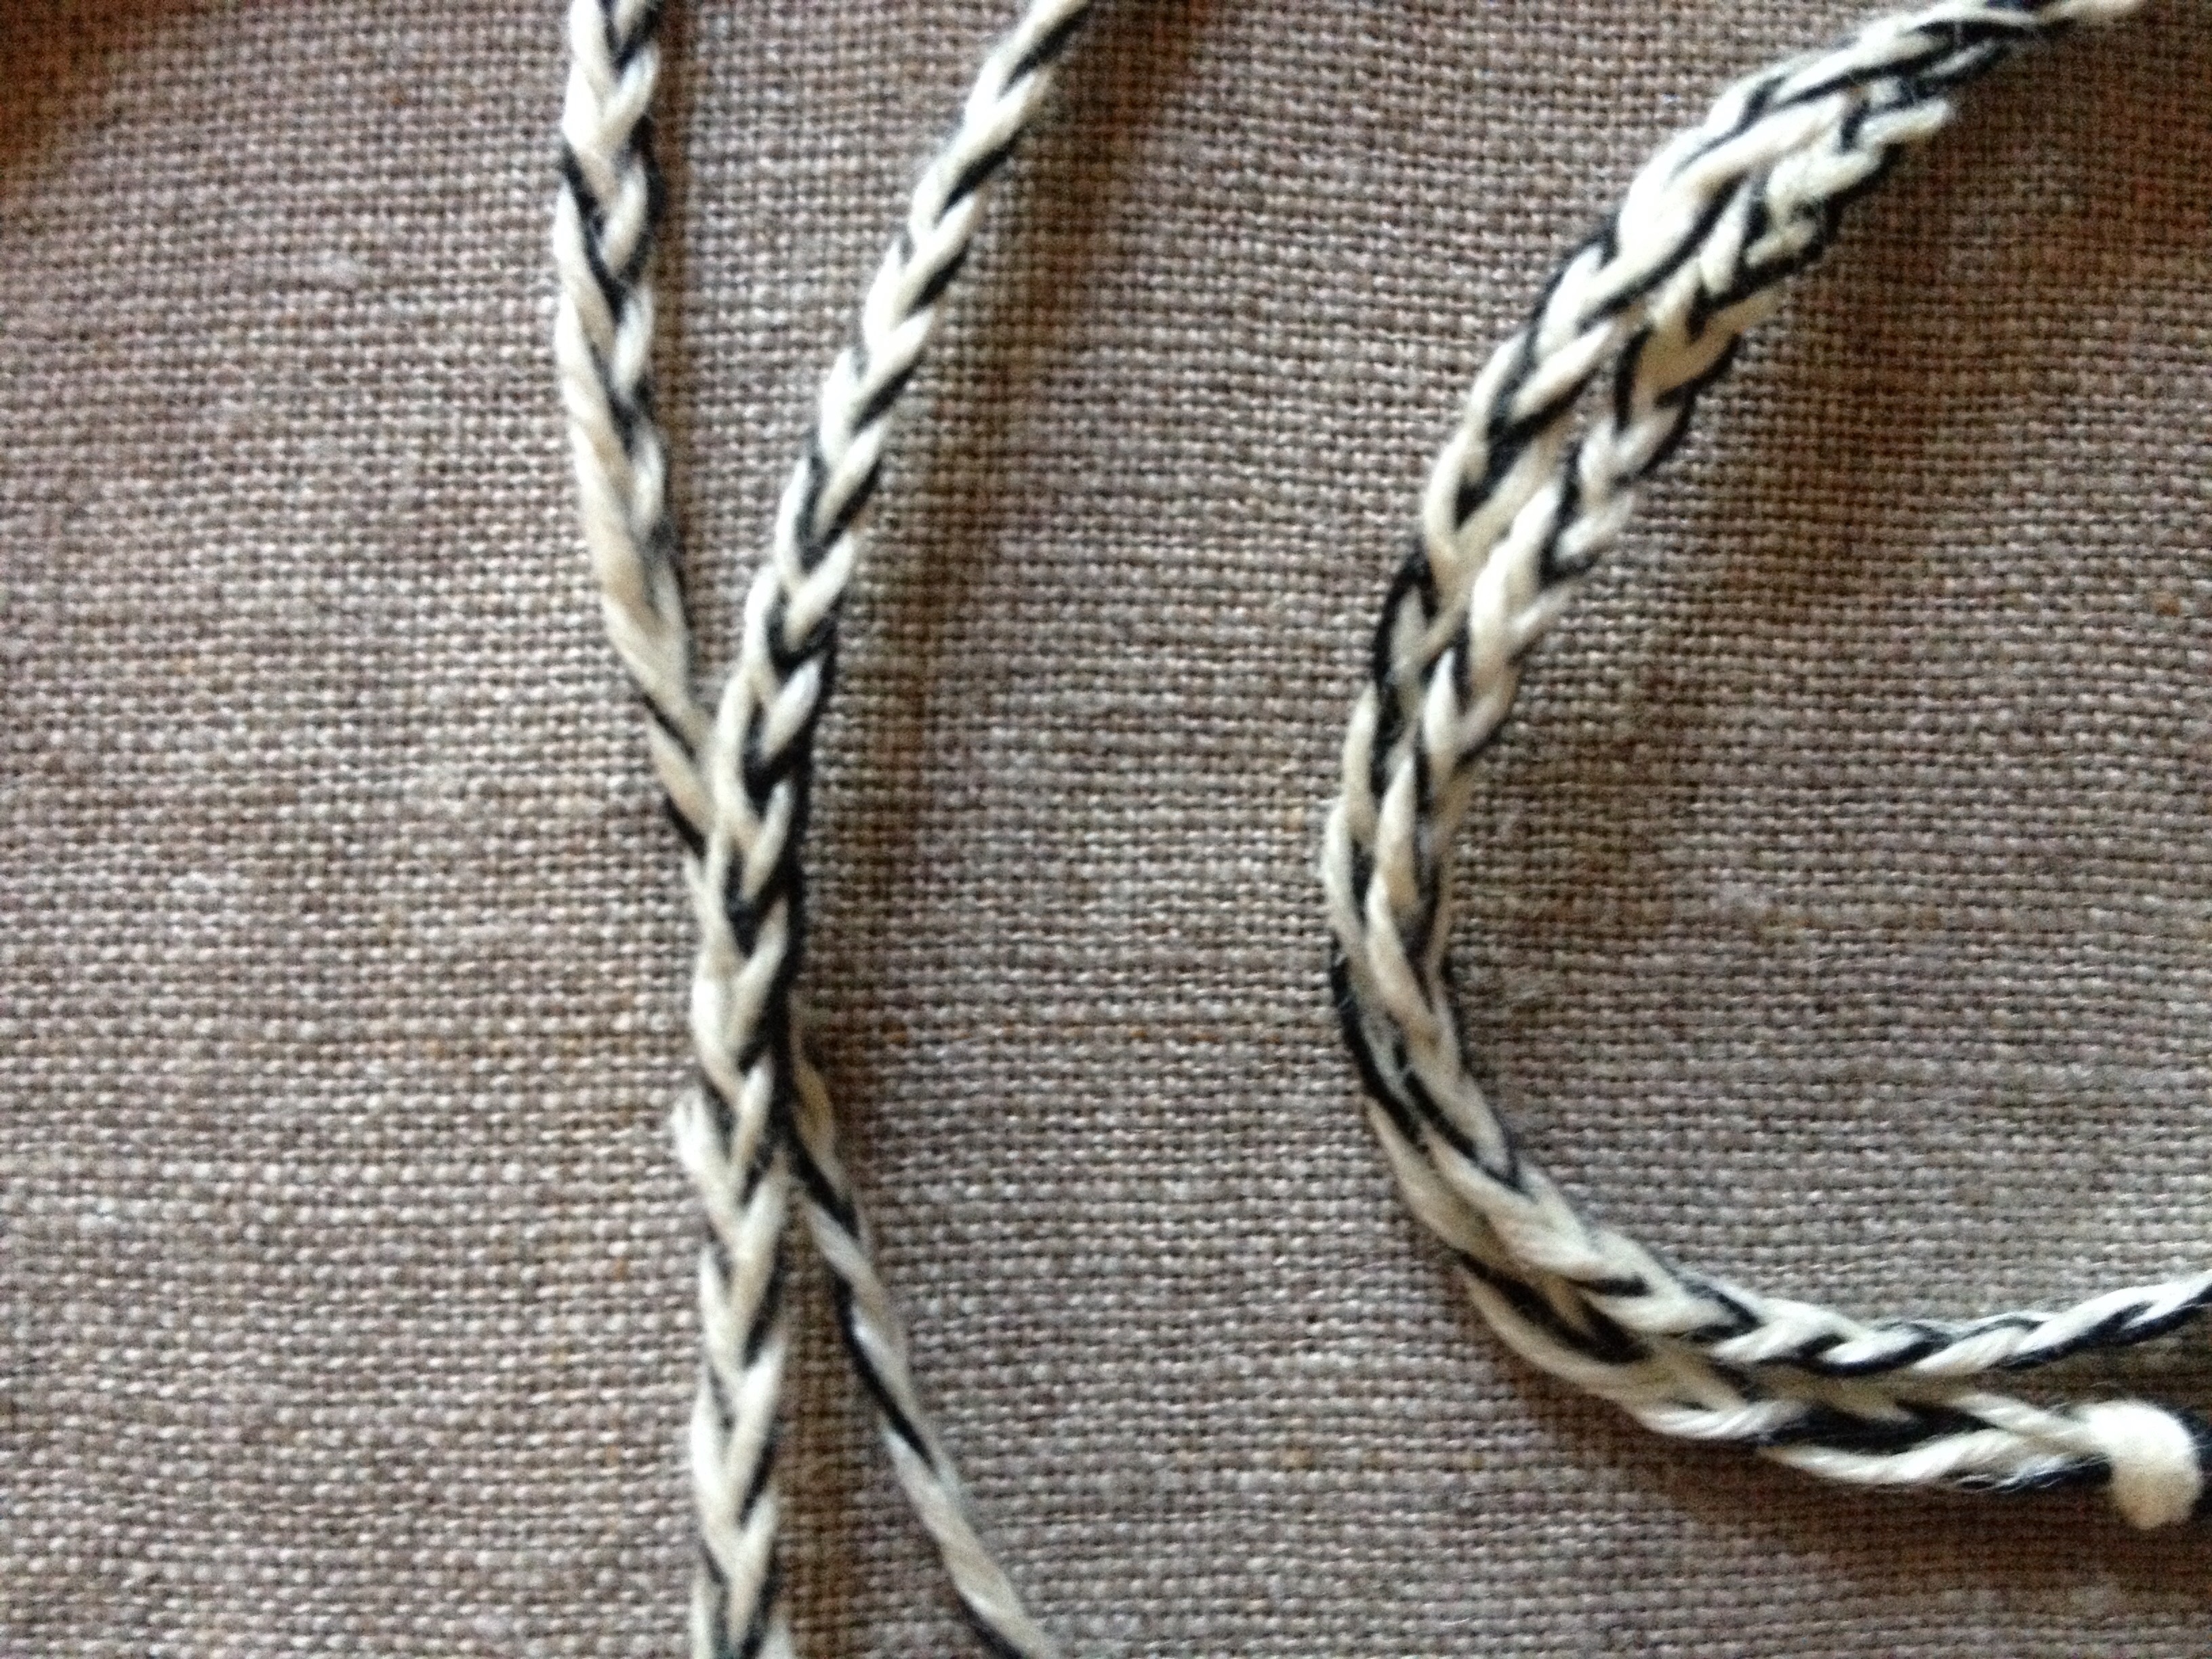
For instance, Robert Baker received a coat made from 2 1/2 yds of grey broadcloth, a piece of silk, 3 yds of looplace, 24 buttons, one long button and some thread. John Mason’s took 3yds qt of cloth, 2 doz buttons at 16d, silk 3d, thrid (sic) 2d 1 long button 10d. Henry Pierey; 3yds 3 qts of cloth, 2 doz bigg buttons 16d, 3 yds loop lace 9d, 1 long button 10d a qtr Poldavivie 3d and silk 4d , thrid 2d.
There are some interesting things in the list, first that the coats were not lined with linen or canvas as were the New Model Army issue coats in 1645. It was unnecessary as the troopers all had at least two other layers of issue clothing. The looplace was probably for decoration, though we decided in this case to leave this feature and the silk possibly for facing the buttonholes on the inside. The long button remains a mystery. As far as I can tell, there are no extant garments with long buttons. The best theories that we came up with are that it might have been something to keep the coat closed around the neck whilst the rest of the coat lay open like a cloak, or possibly a regimental icon or badge.
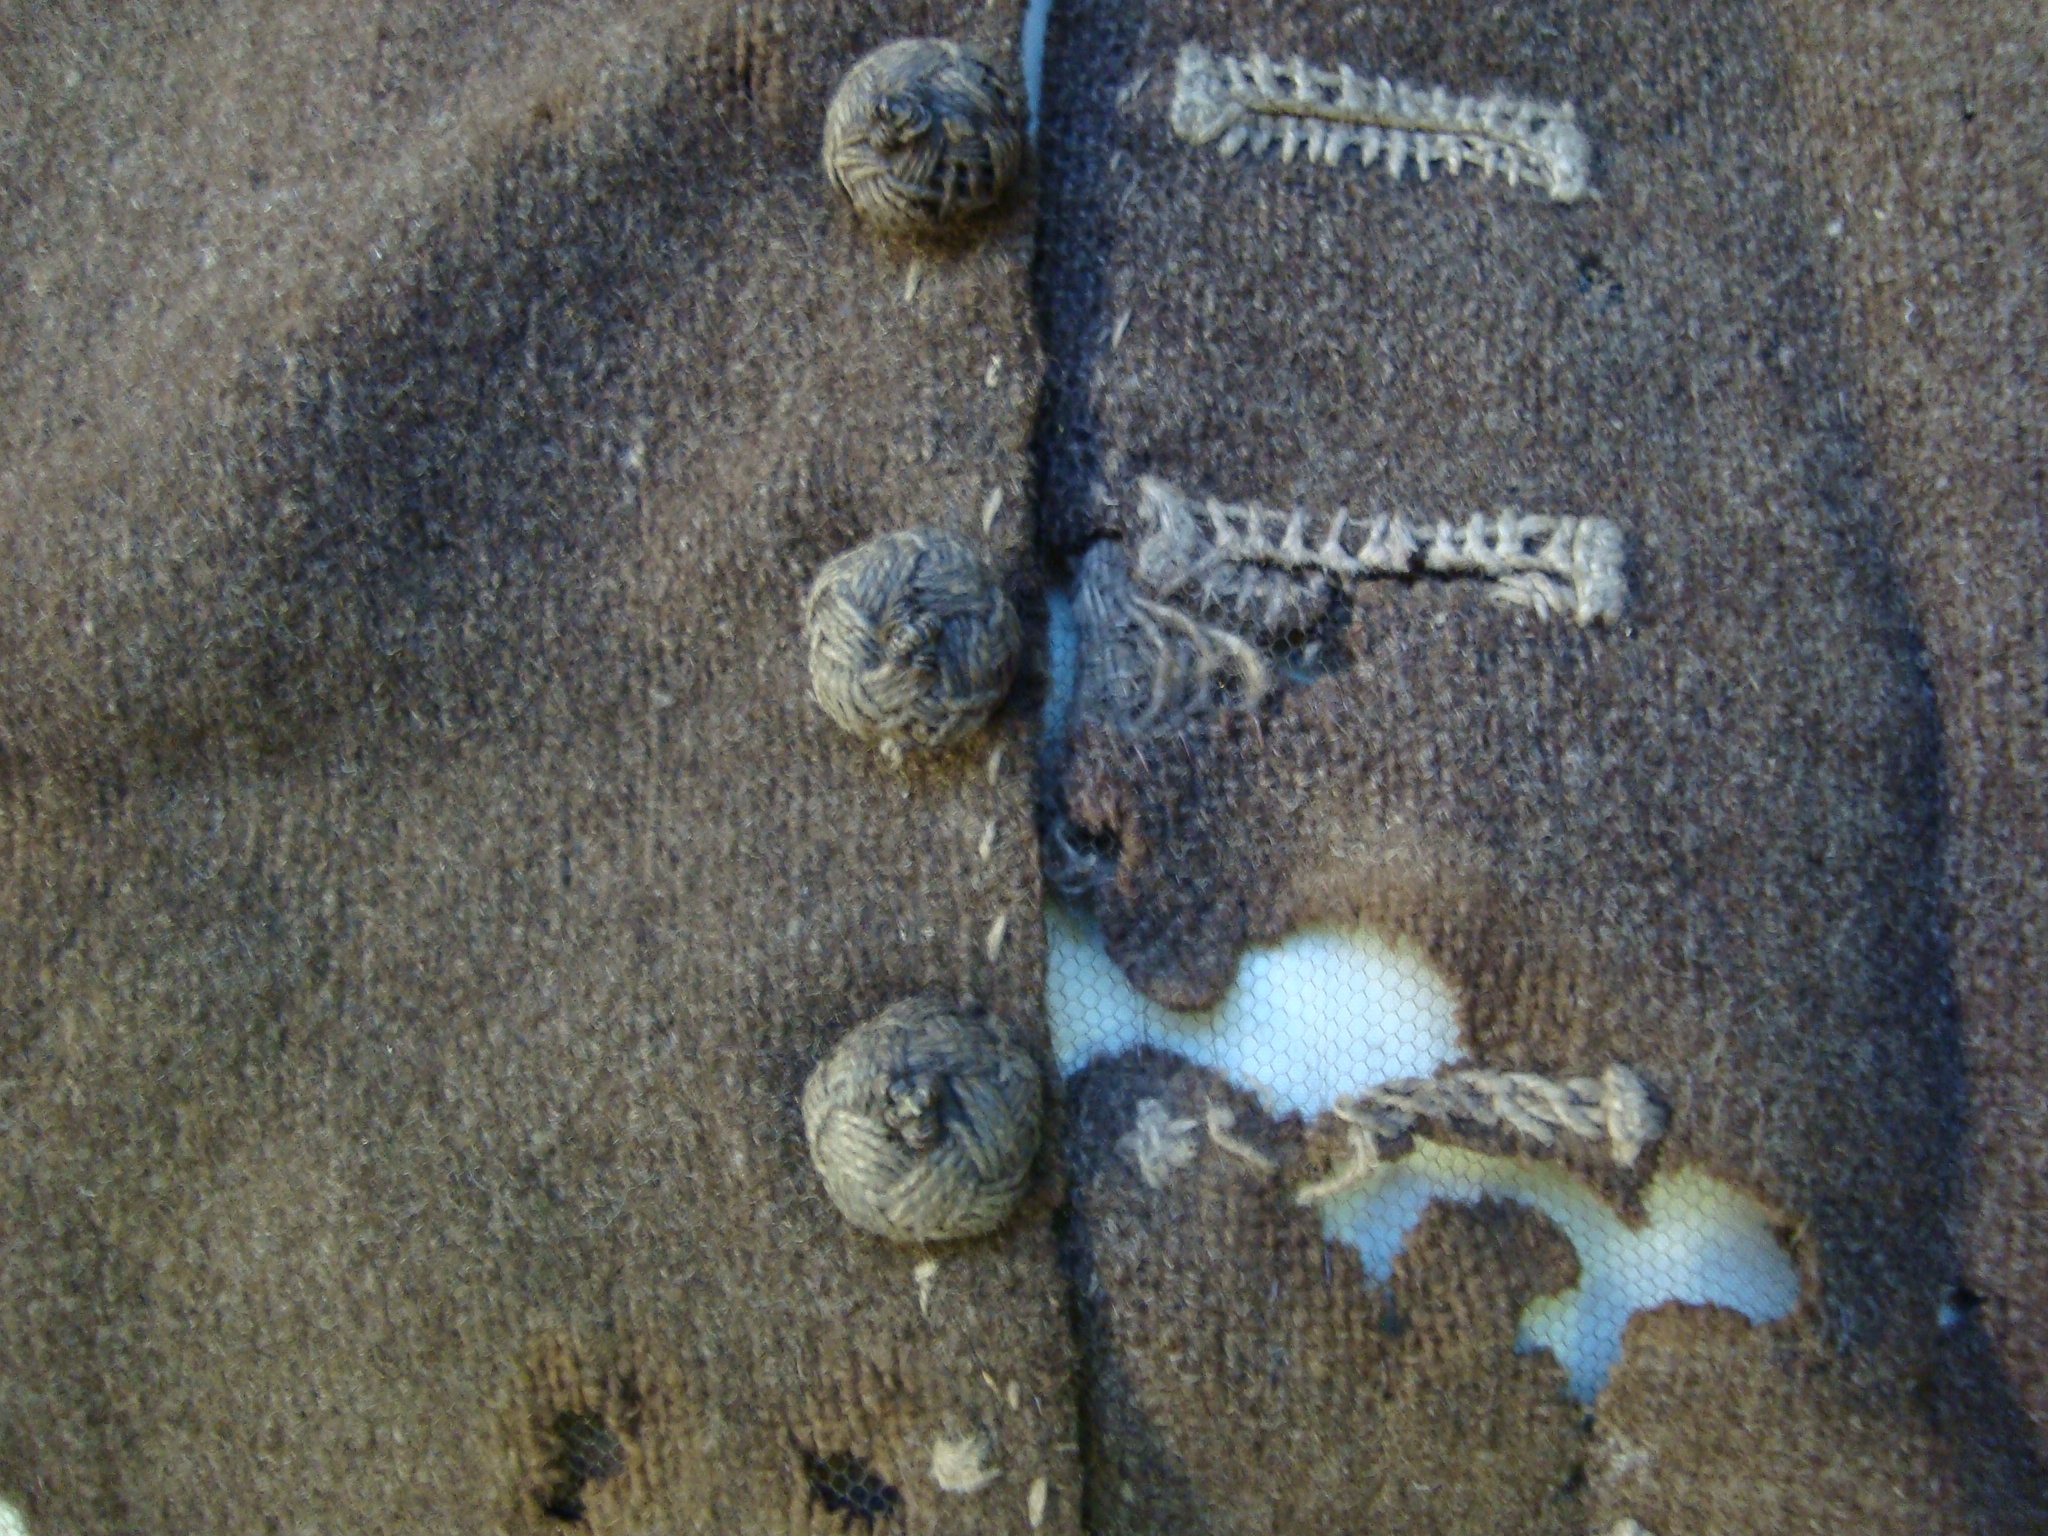
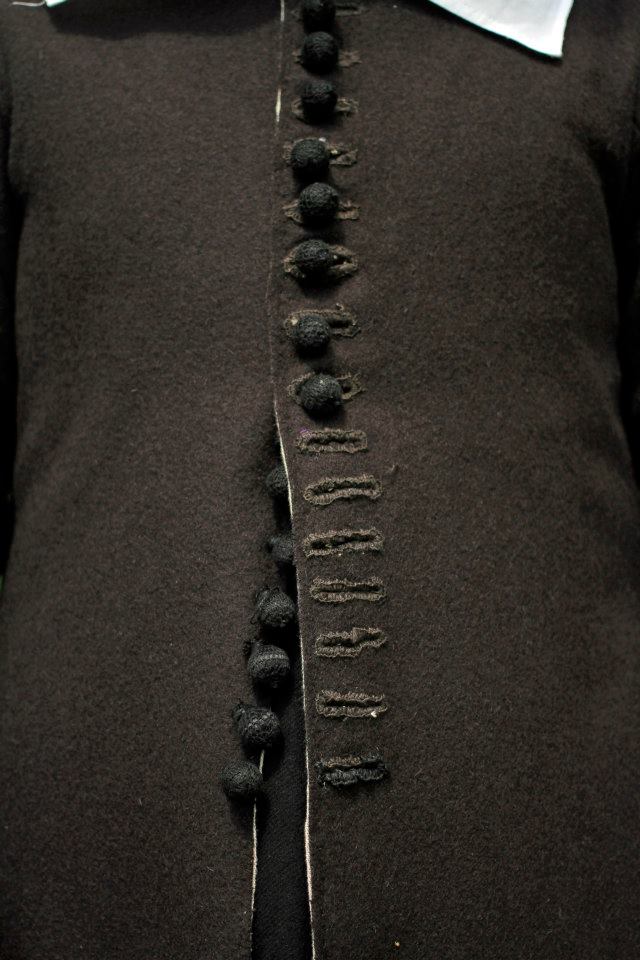
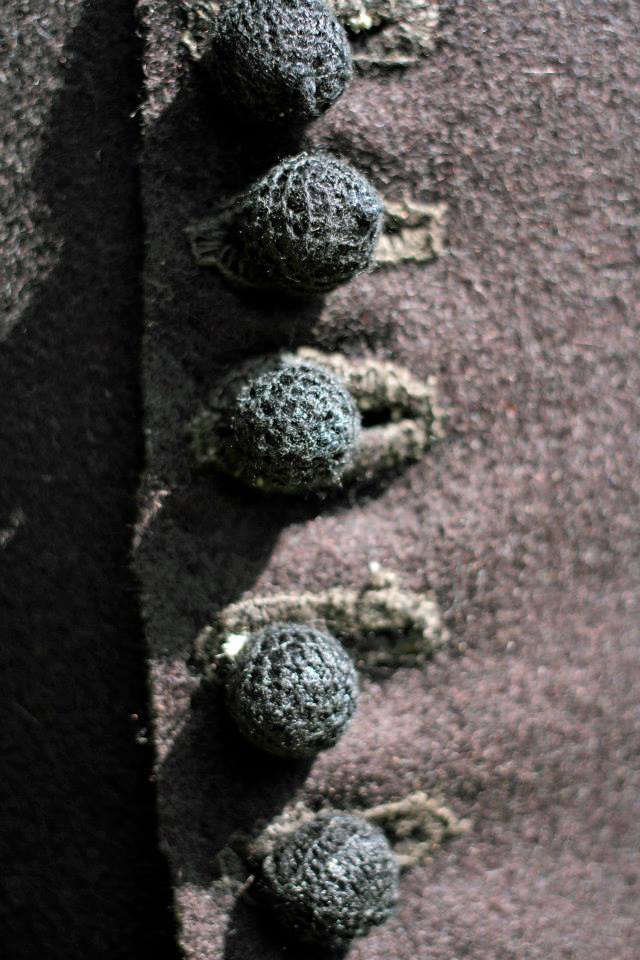
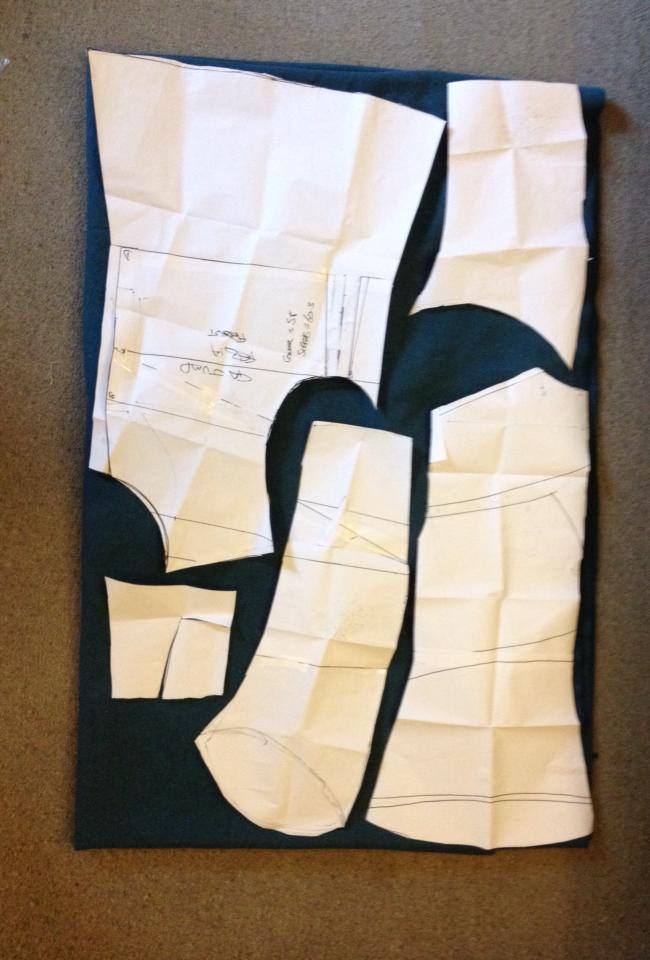
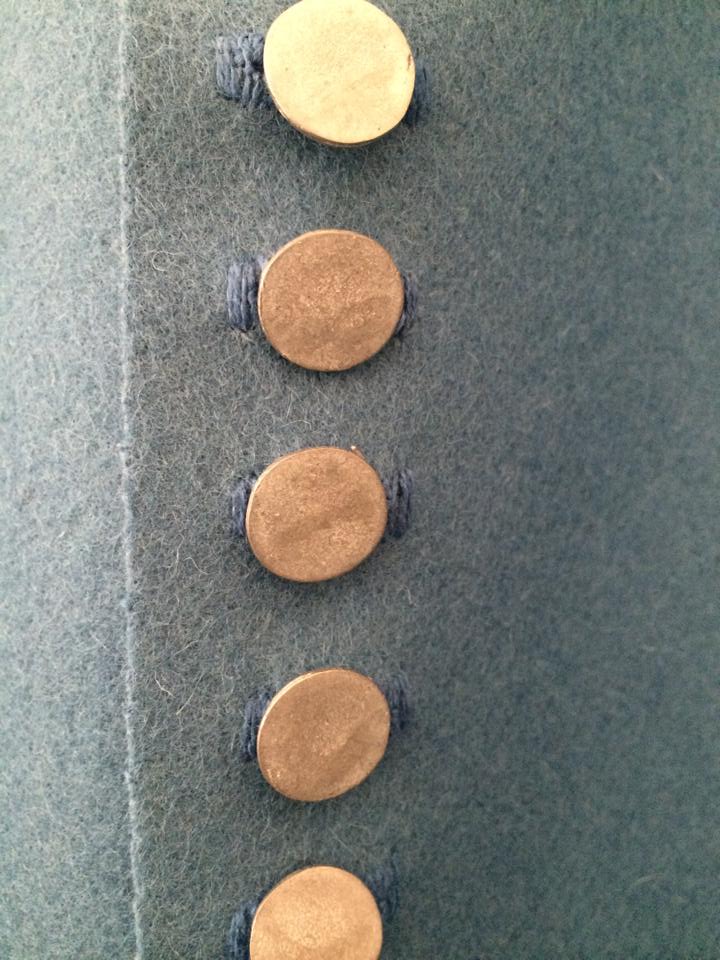
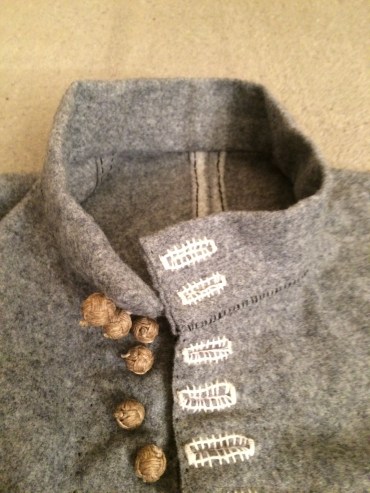
The pattern I used was based on two coats I have examined, one in Colchester Museum and another in the V&A collection, both of which I’ve discussed in previous posts. It’s a basic coat block that flares from the hip with skirts that are the maximum width of a bolt of broadcloth. Once the pieces were laid out, it was obvious that the pattern would use best part of 2 1/2 yards of the cloth which matched the cloth allotted to Trooper Baker in the 1640s. The buttons were made for the tailor and based on the pattern of those used in the Colchester coat. It’s a turk’s head wrap and produces a serviceable button with a nice detail.

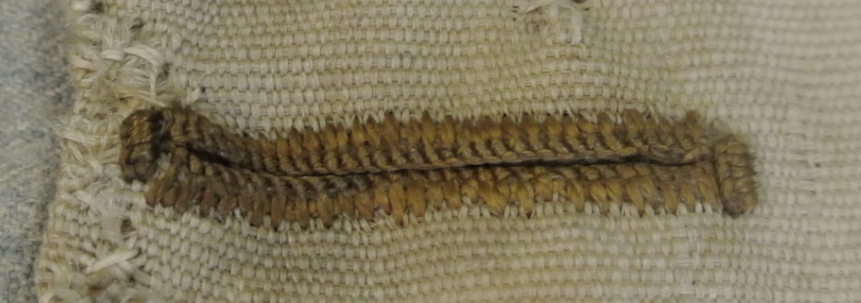
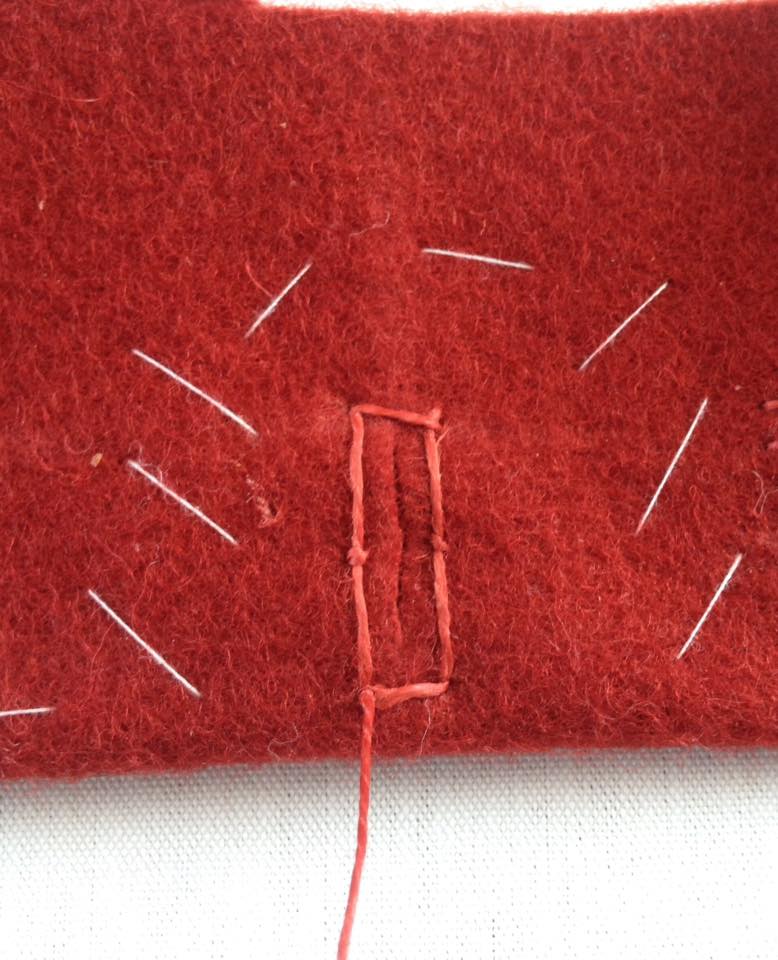
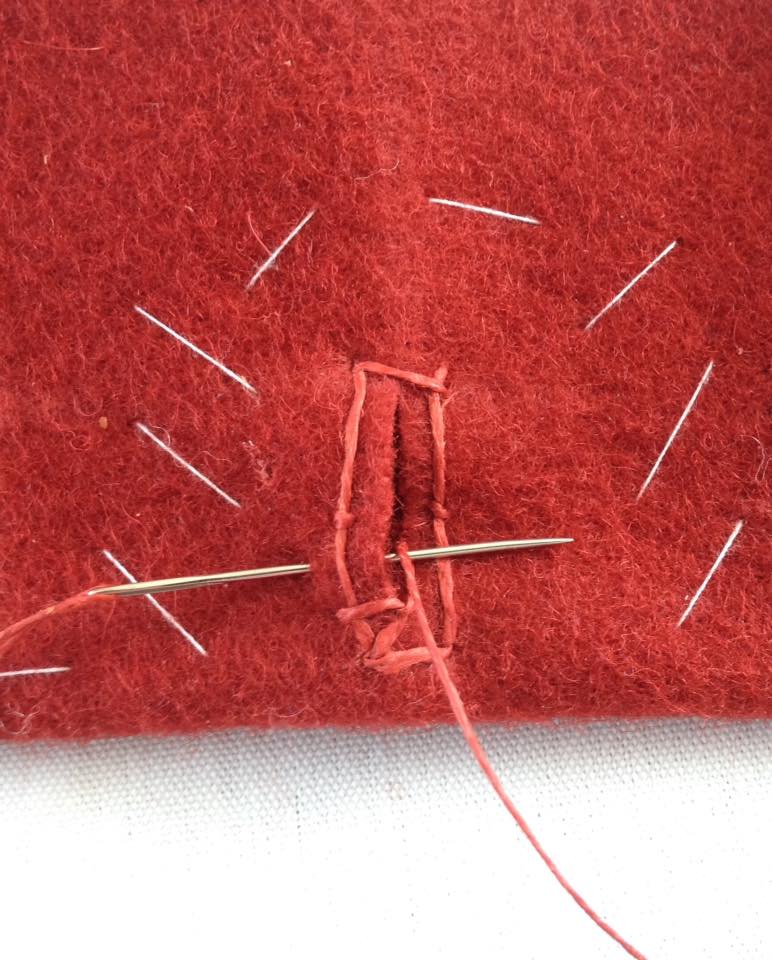
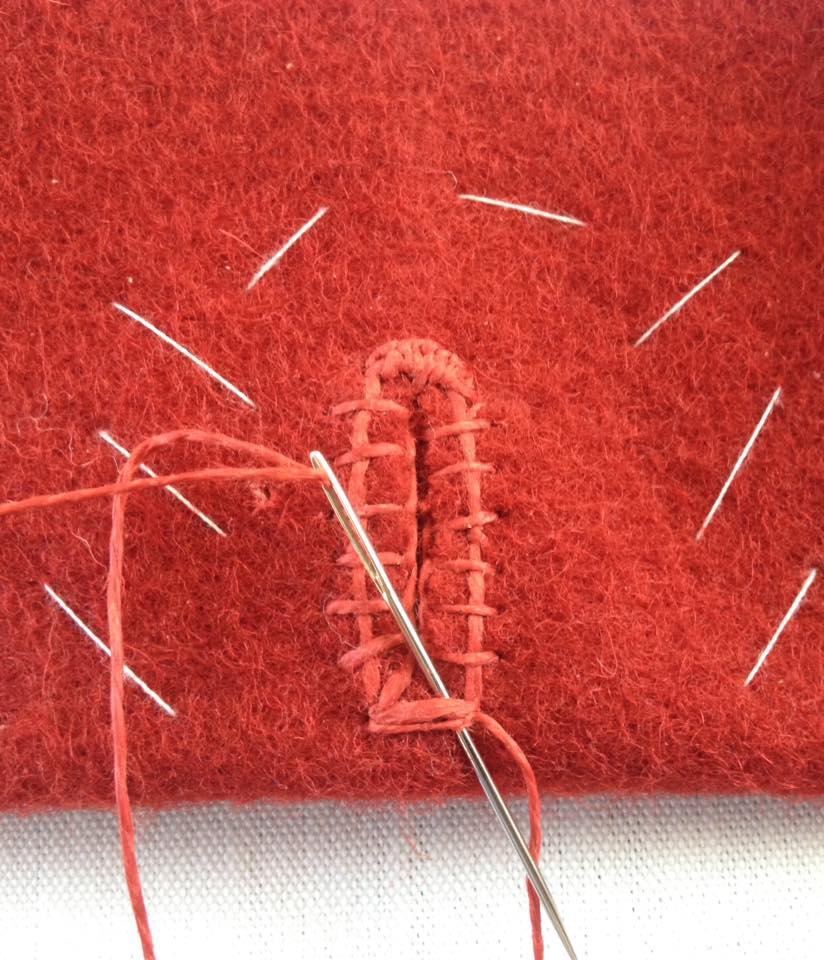
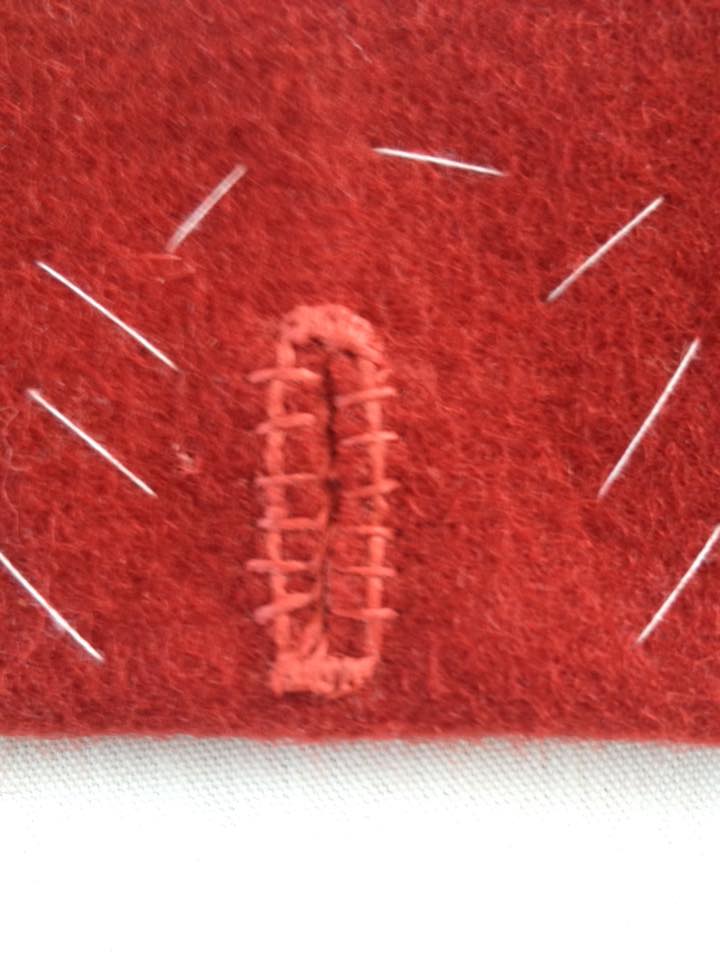
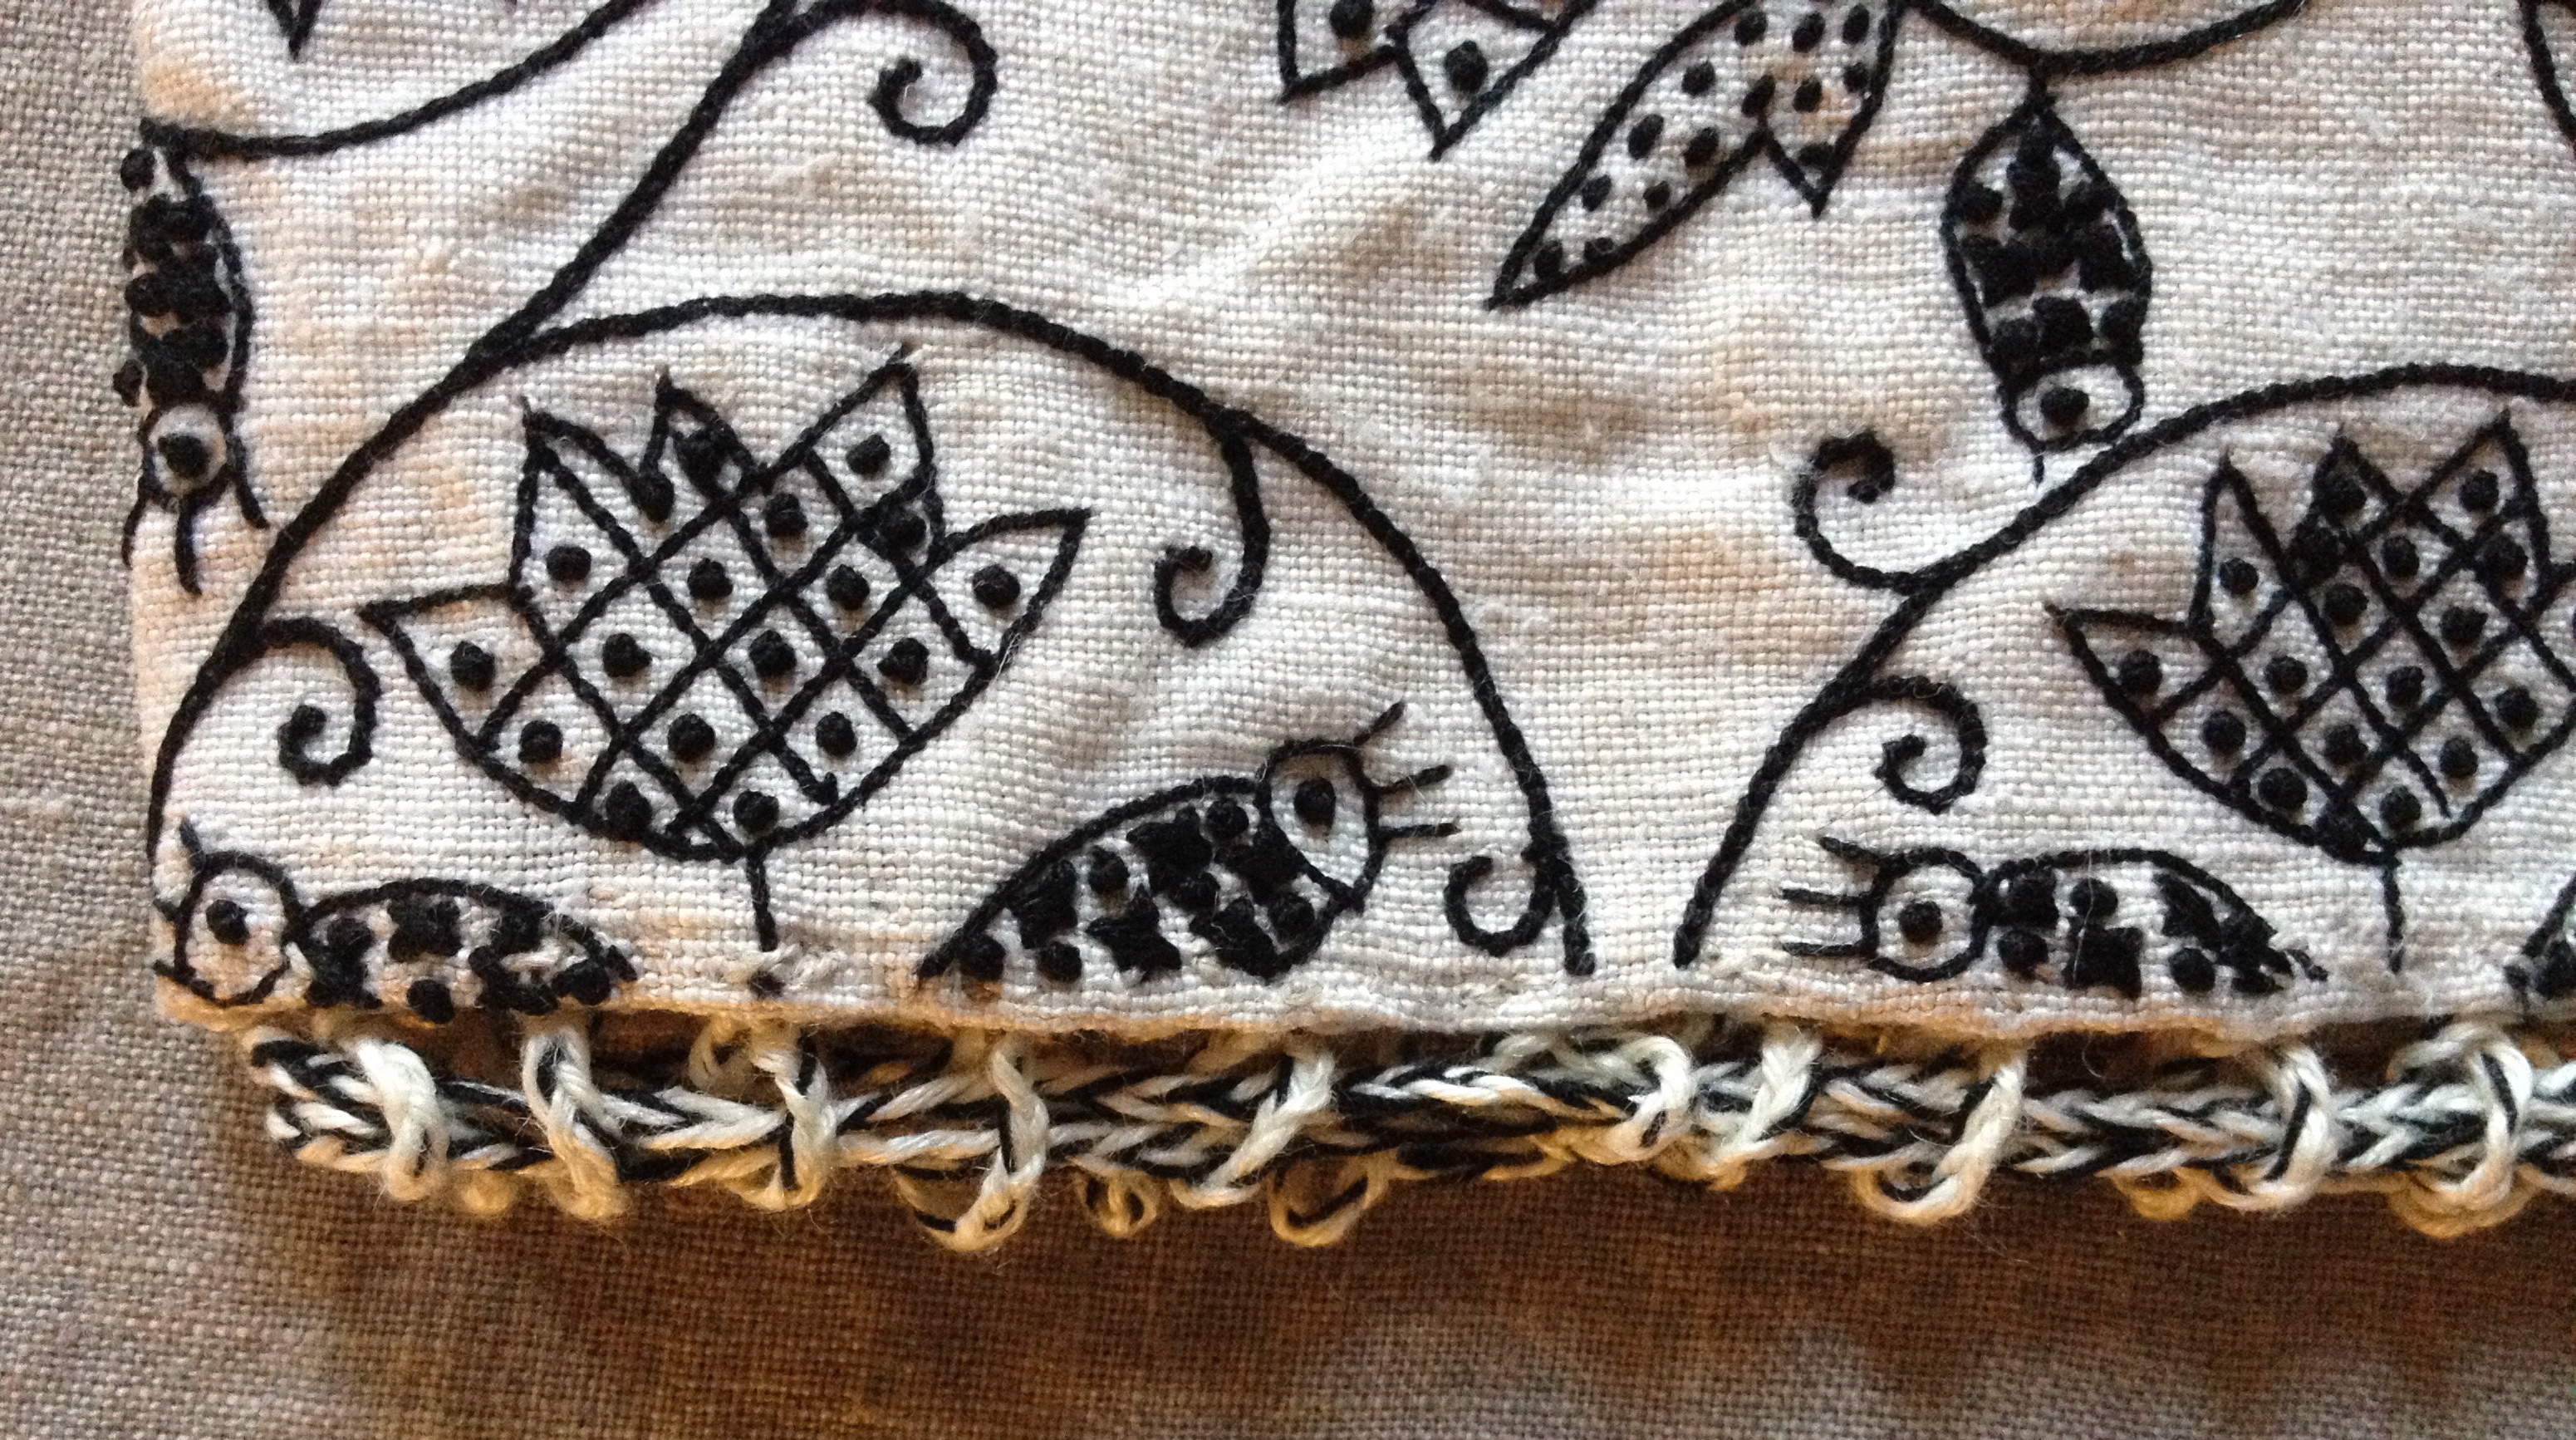
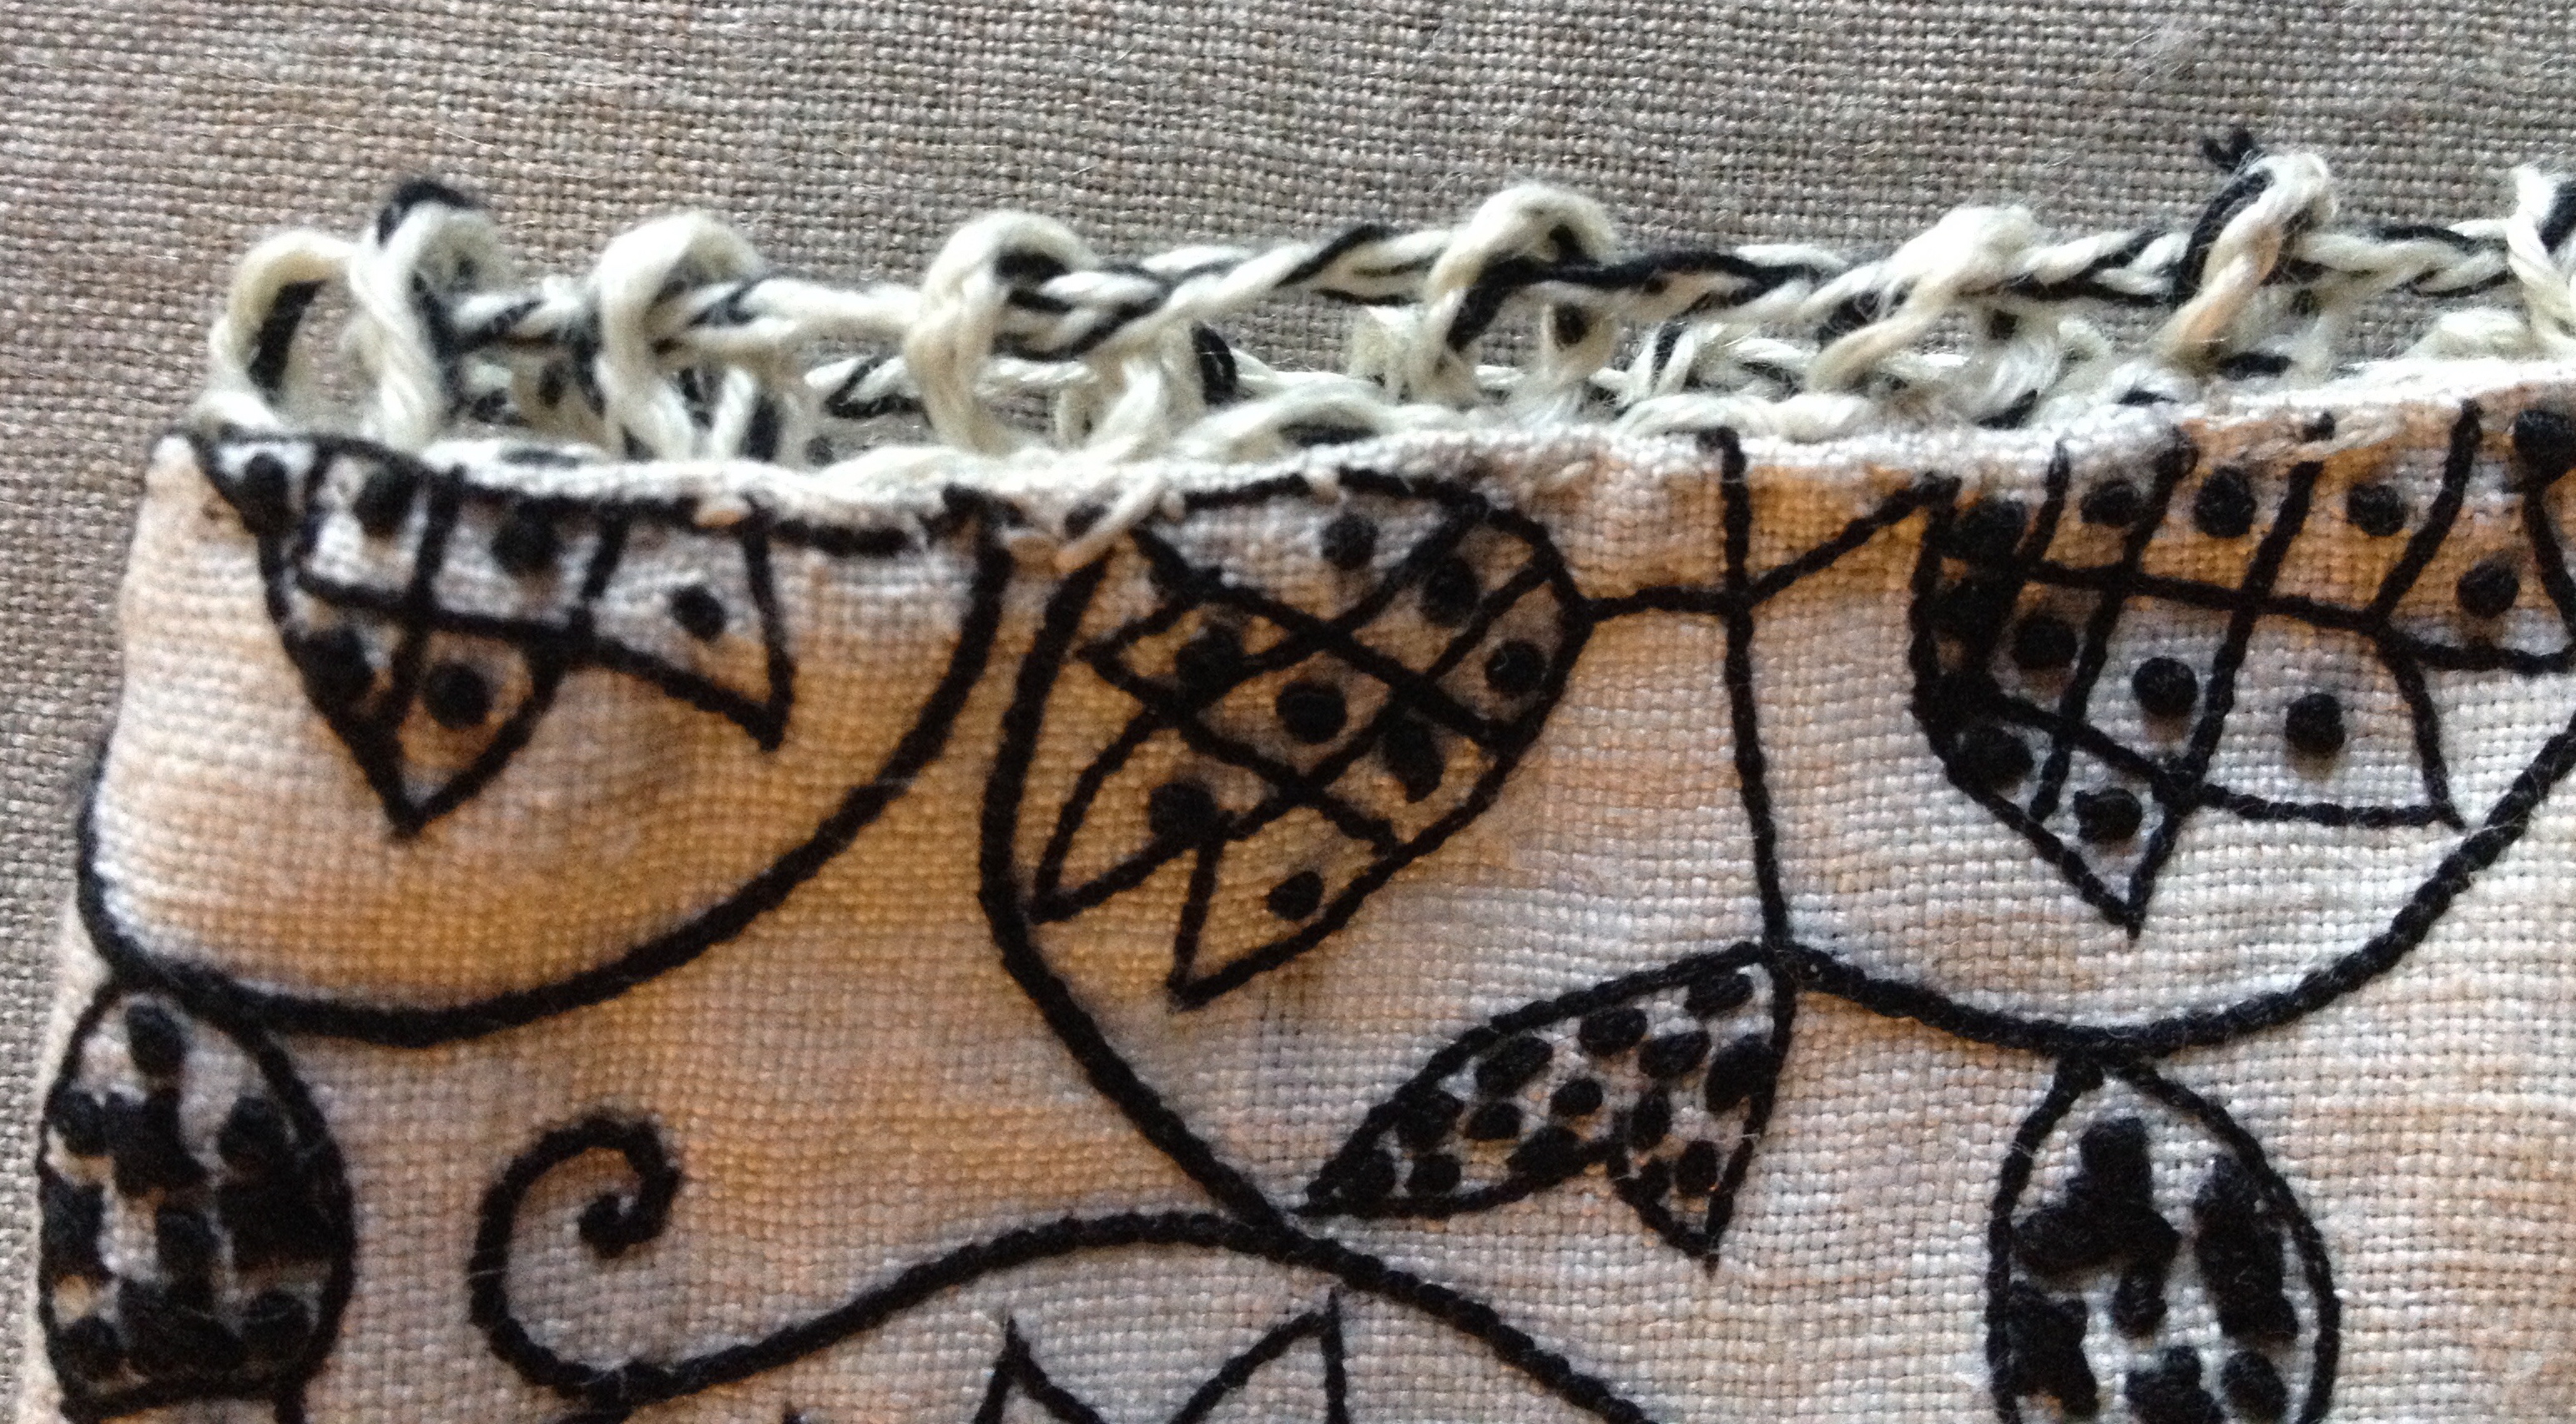
The buttonholes are also based on the Colchester coat, the simple open-worked linen ones. We went for undyed silk thread.

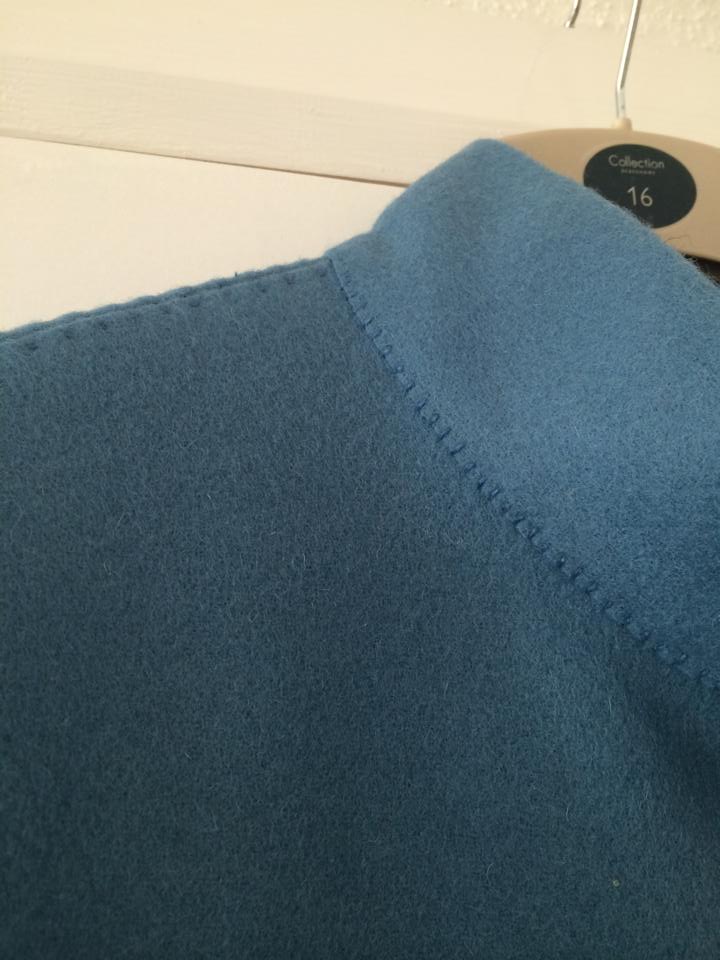
You’ll notice too that the edged of the coat are left raw. This was a standard feature of 17th century tailoring and was certainly used on the Colchester coat.
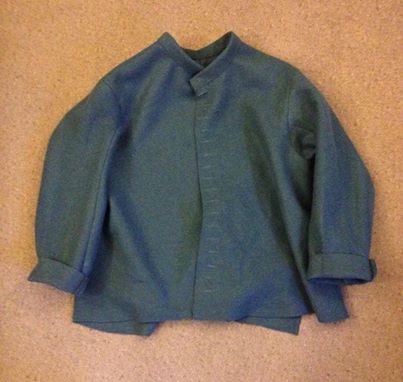
With an unlined wool coat, the hems need to be sewn down to avoid fraying every time it is worn. I used a prick stitch so that the external stitches were minimised. In the next photo you can see this together with the internal seams, plus the seam attaching the collar. This seam I have seen on several original coats and doublets.

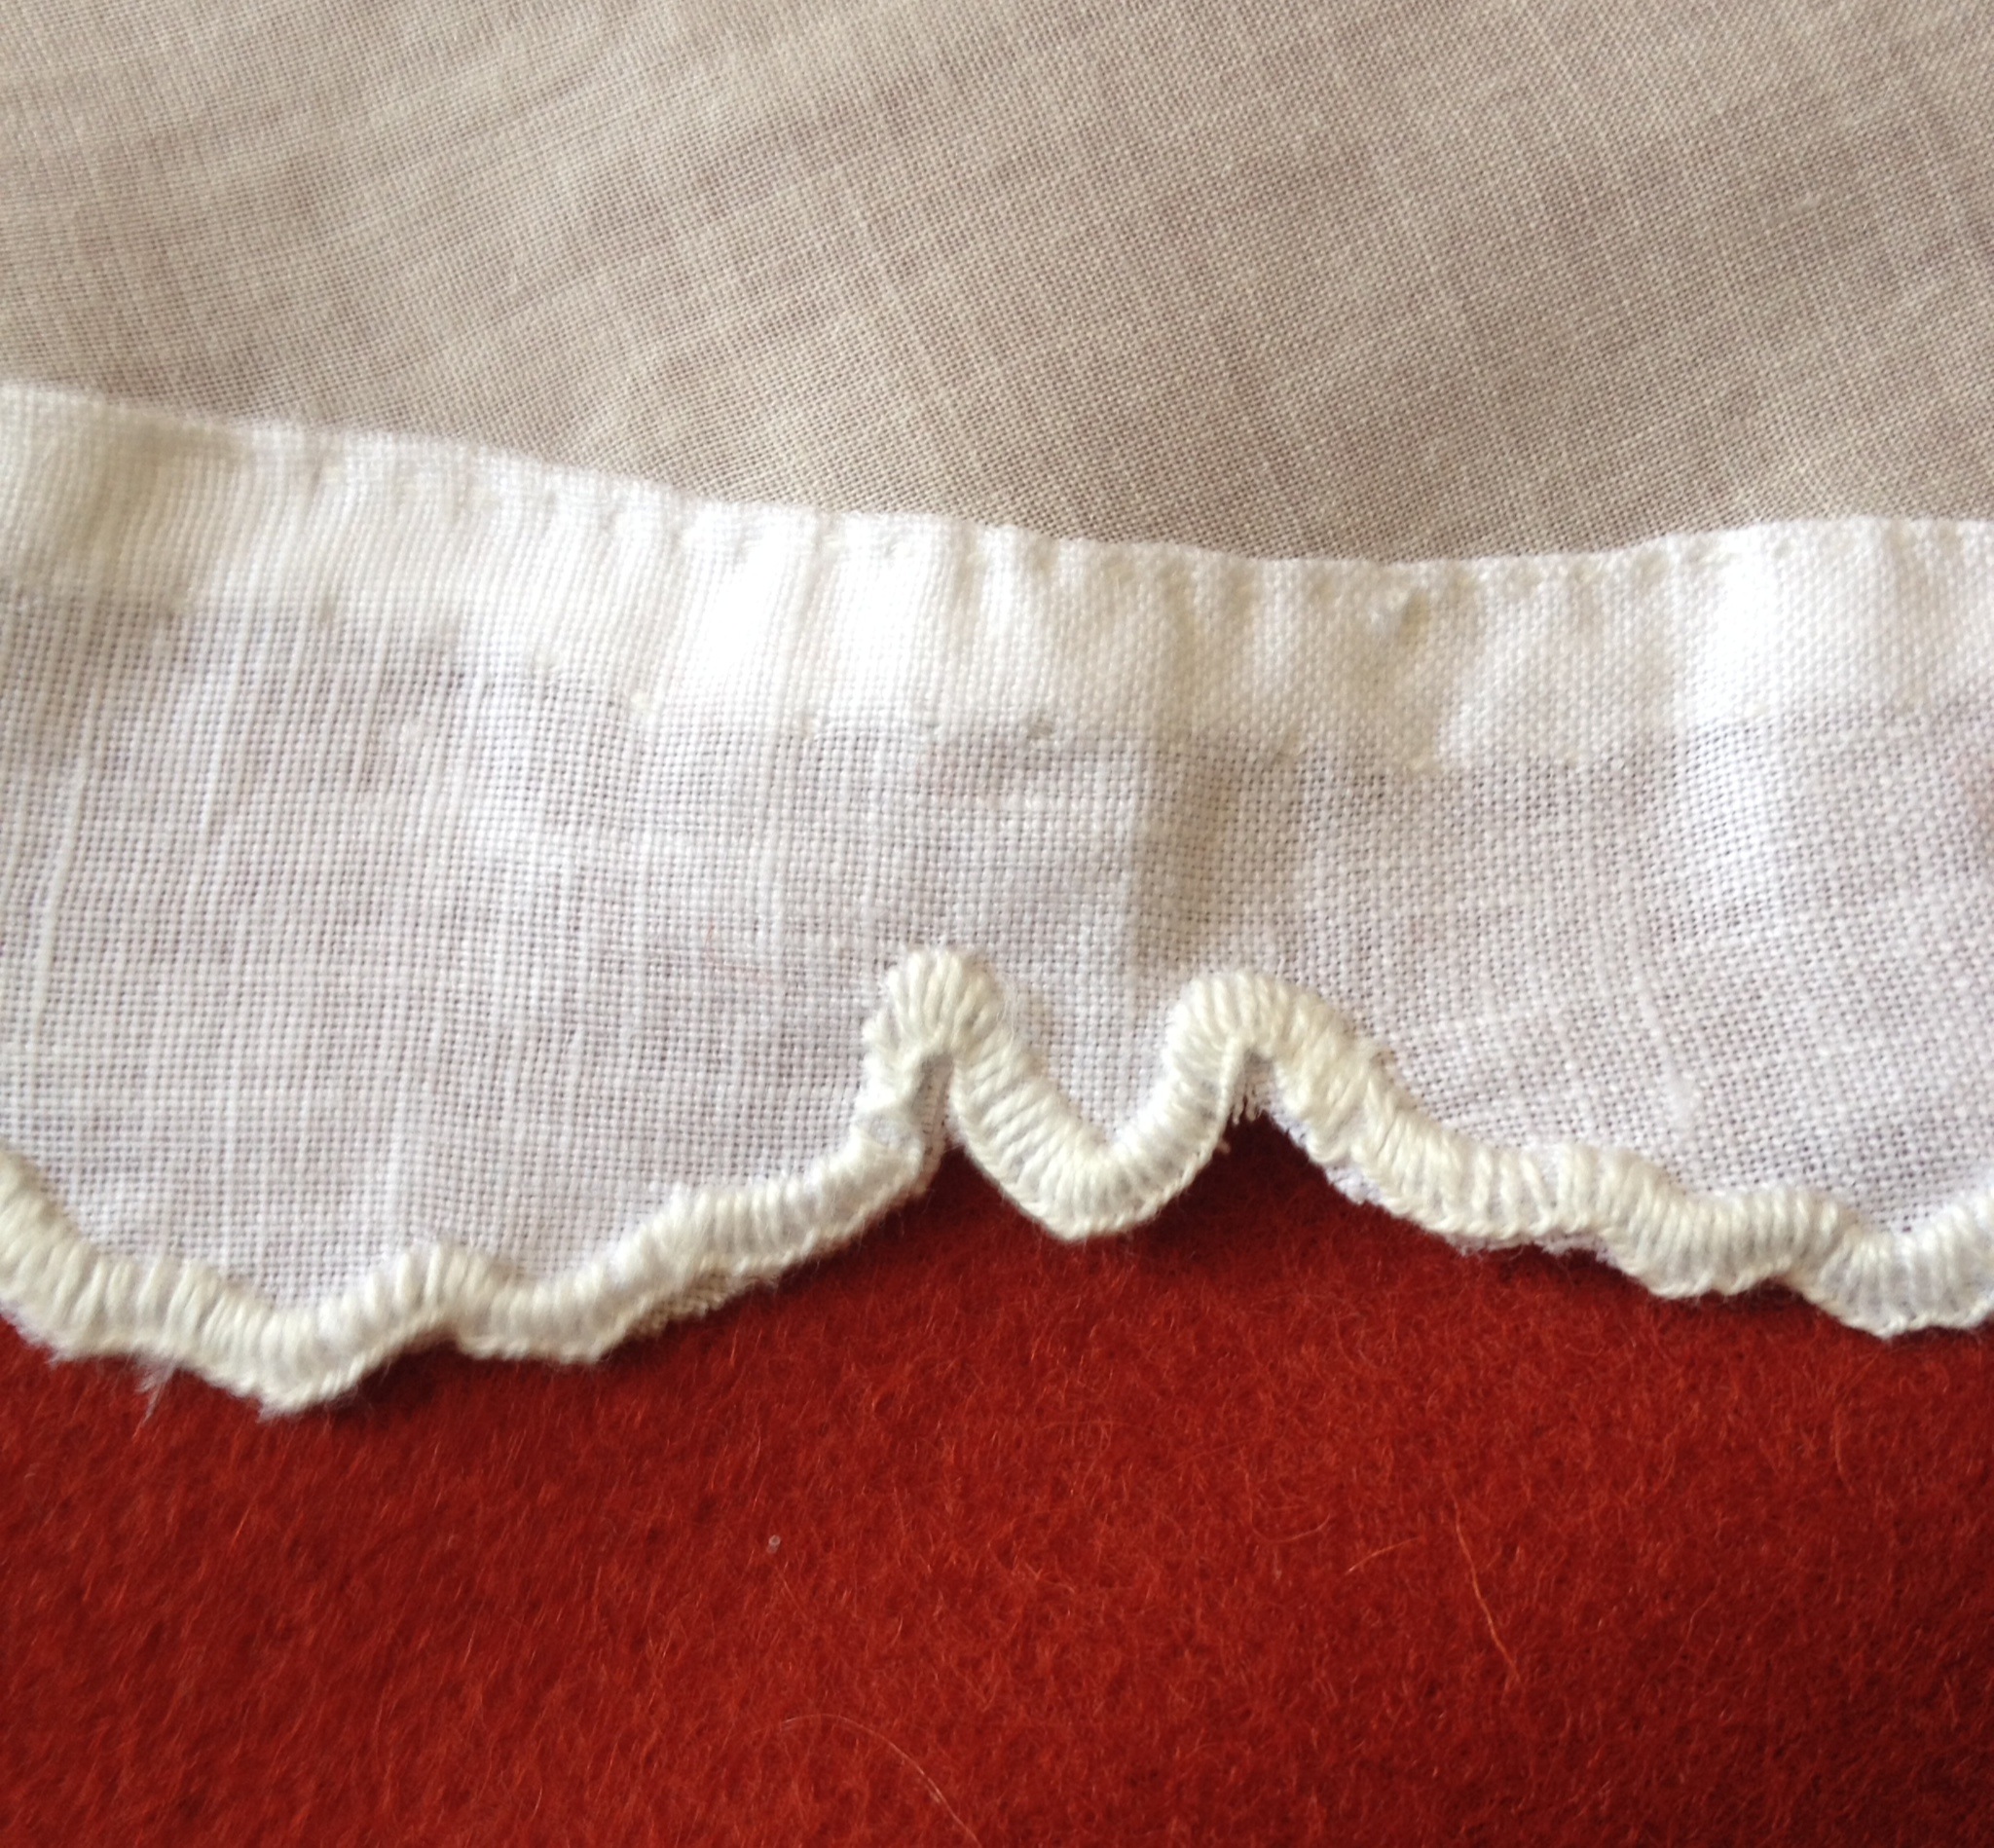
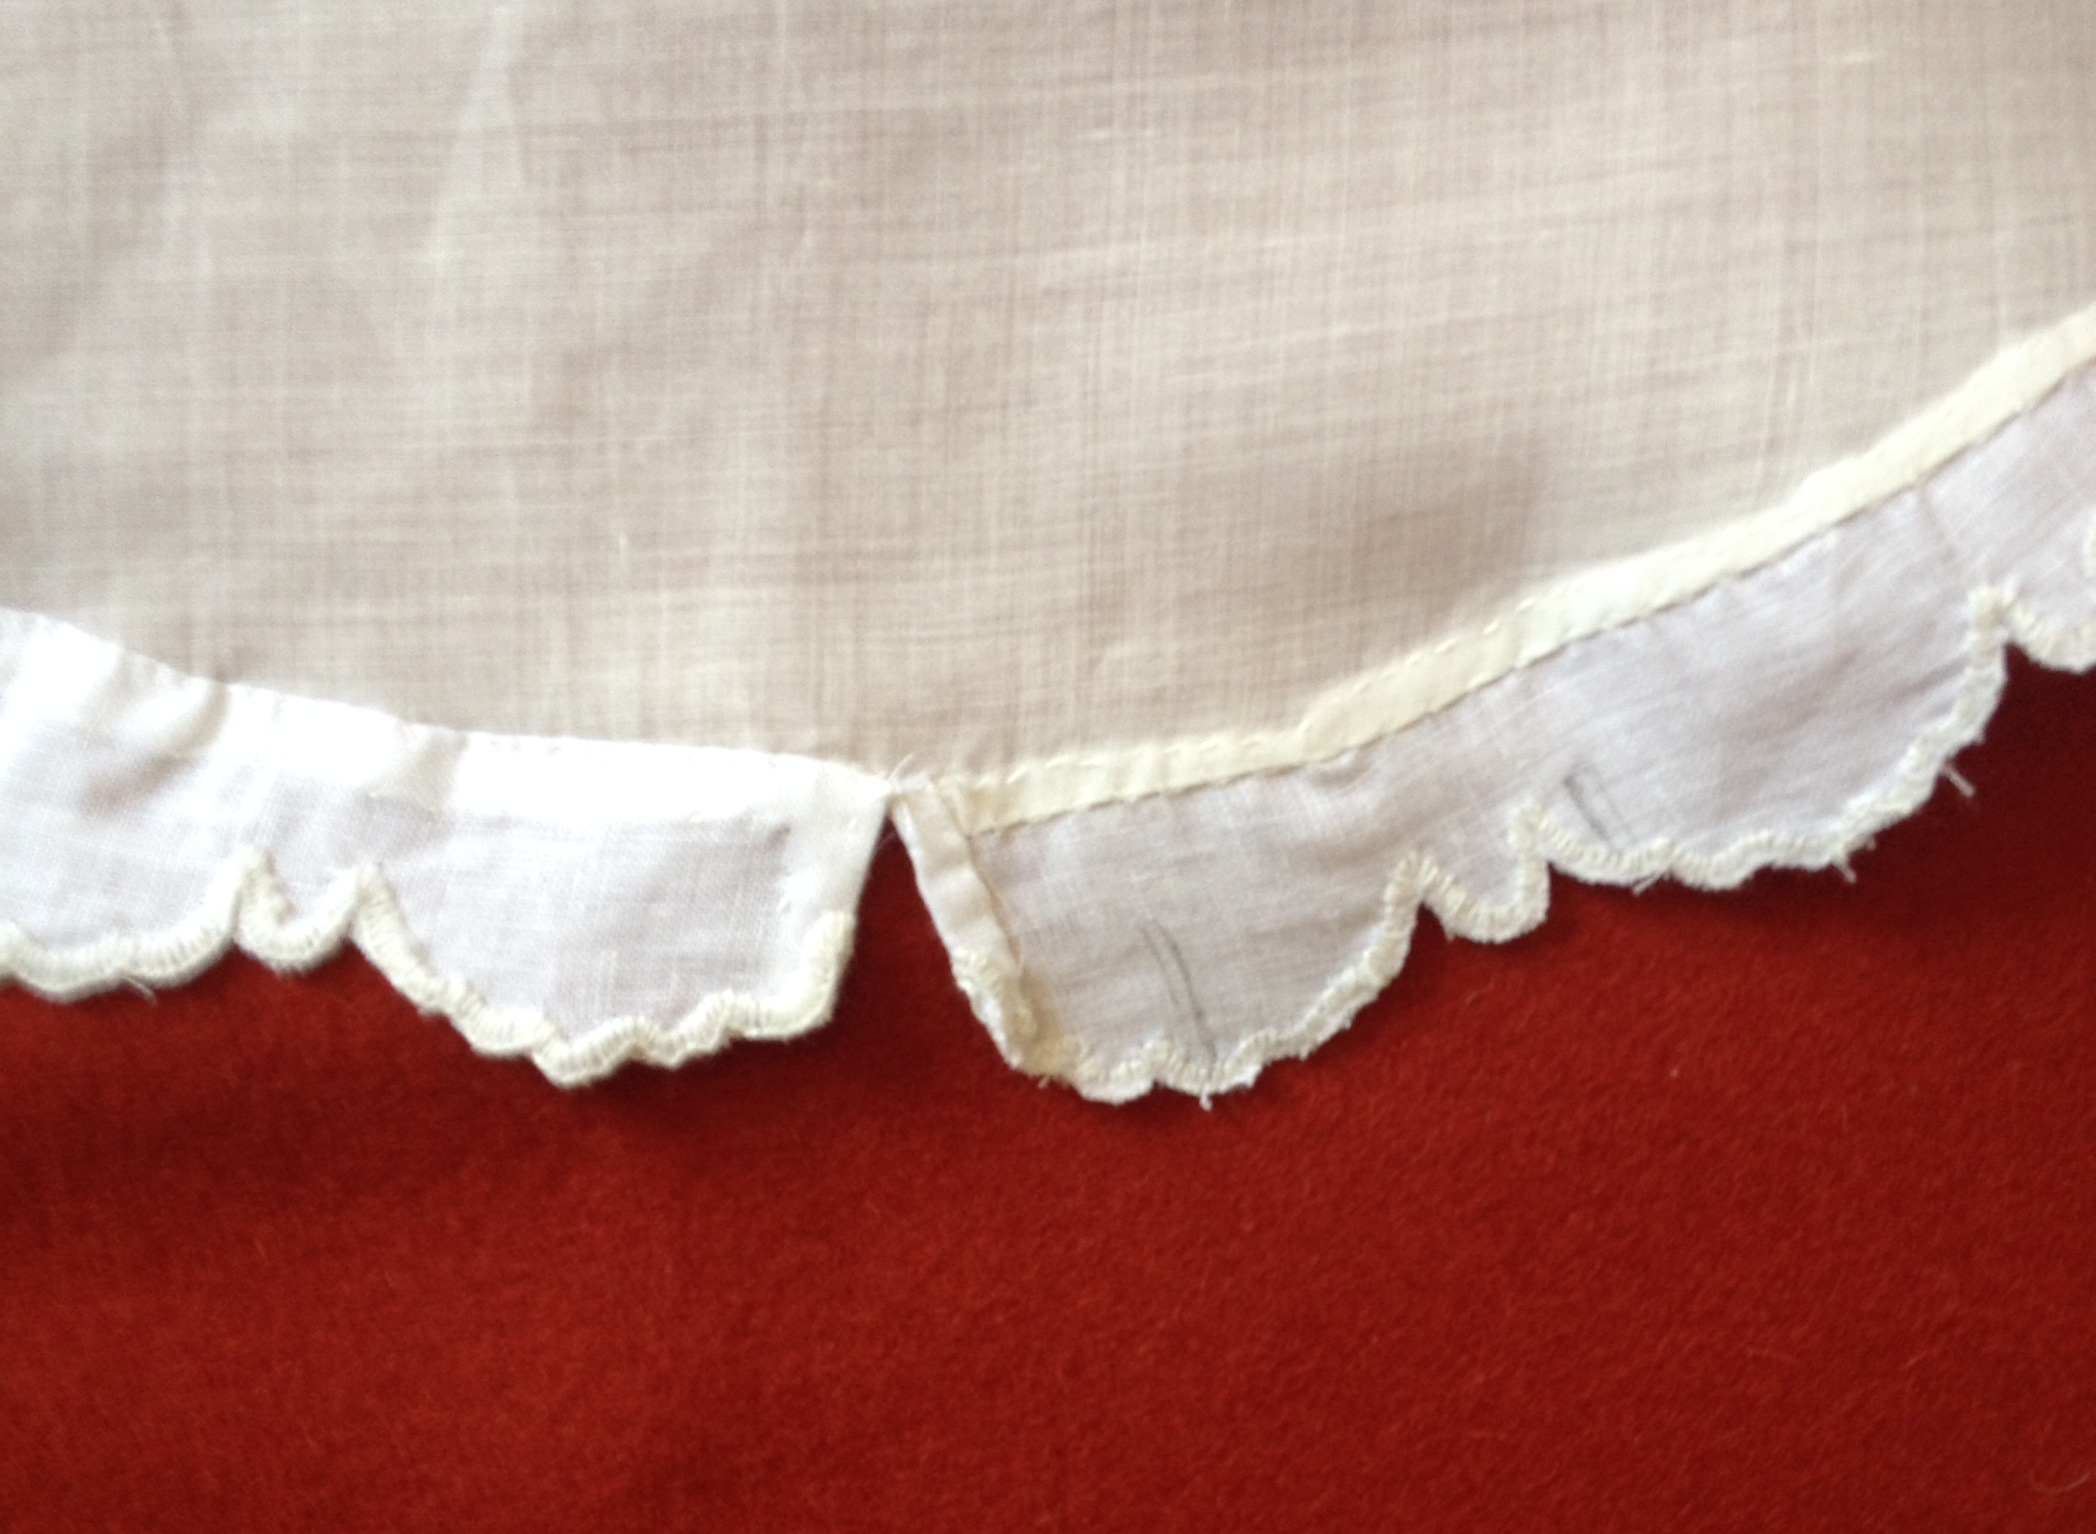
The sleeve ends in a turnback cuff. The construction is a little conjectural. The V&A coat is lined and the Colchester one has later cuffs added so I decided to make these by snipping the seams and turning them inside at the point of the cuff so that the allowances were always inside and hidden.

Basic Period Buttonhole
As it’s been a while since we posted, I though I’d show how we do our buttonholes for basic coats and give some examples to show where the stitches come from.
The basic outline comes from a coat that I’ve discussed before in Colchester Museum. The construction of the whole thing is very simple and the buttonholes are no exception. If you look at this photo you will see what I mean. The buttonhole starts as a thread gimp around the cut hole and then stitches are worked around the opening, not as close as you would expect from more modern buttonholes, making the whole thing quite open and actually quick to make. The thread at the end is worked around the sidebars to finish the thing off.
Here’s another example from a 1630/40 coat. Though this is more closely worked, the technique is very similar.
Now here is my version.

First mark out your buttonholes and tack (or pin) around where the hole will be to stop the layers from moving.

Work the thread around the hole, outlining the buttonhole and making sure not to pull it too tight. I like to put in a couple of anchor stitches on the long edge to stop the gimp migrating into the hole.

Make the basic stitches in this manner, so the thread lies across the outlining thread and so that the knot is made on the inner face of the buttonhole. Work all the way up one side in this manner. I’m just wrapping the thread over the needle here. You could go right round to create more of a knot, the choice is yours.
New Rogues Gallery
The Modern Maker Vol 1 Doublets
I’m adding this book to the list of recommended titles. It’s a little specialist but if you are at all interested in the way clothes went together in the 17th century rather than wearing something that just looks the part, you need to read a copy.
Mathew Gnagy lives in New York and has years of experience of tailoring both modern and historical clothes. He has put a lot of that experience into the book and initially financed publication via kickstarter and I’m glad he did. It’s a gem.
The book takes you through all the stages of making a man’s doublet of a style worn in the early part of the century. The pattern can with care be adapted to a more modern style (eg for 1640s), but I’d recommend you go with Mathew to start, just so you get a handle on the methods. It’s divided up into sections, tailoring principles, fabrics, pattern drafting, hand sewing techniques and how to make the doublet last of all. He has taken the bold step of not including any instructions for machine sewing, and all the interlining and tailors padding etc is done by hand. I think this is right. Why go through all the bother of making something as involved as this without doing it the way they did? You will learn so much about the clothes they wore by making them the original way rather than bashing through the project with a machine. If you want fancy dress this book isn’t for you anyway.
All the sections are clearly illustrated with original examples laid next to Mathew’s work and it’s easy to follow through the method and refer to the necessary pictures as you go. The period method of pattern drafting in chapter three is based on a spanish method of making graded tapes and could be easily replicated for a living history display.
I particularly liked Mathew’s buttonhole method (it produced the neatest buttonholes I’ve ever made) and the way seams are stretched here and eased there to create a sculptured three-dimensional shape out of two dimensional pieces was a revelation to me. Negative points? I think there could be something about stiffening and belly pieces, but that might have just made the whole project a bit too unwieldy.
The proof of the pudding however is in the eating. I used Mathew’s method to construct this doublet. I admit I didn’t use the pattern drafting, as the pieces were already marked out, but I did use all the other sections of the book, and had I not I would have come up with something vastly different in feel. This new doublet has a weight and almost an authority to it that i’ve not managed before. I’ve learned so much from this new book. All thanks to Mathew Gnagy!
An Embroidered Coif
Based on an example in the Met Museum in New York, this is worked on linen in black silk and sewn to a pattern of a coif in Janet Arnold PoF4. This is another example of the lovely embroidery work that Araaish Designs in Mumbai are doing for us. Construction and design is by the 1642 Tailor.
The pattern for the coif is based on an embroidered one in Janet Arnold’s book. The original has a red, green and black pattern with barberries and leaves, but the basic layout is the same. We’ve kept the linen drawstring and the thread loops of the original as you can see from the photograph.
The pattern for the embroidery is taken from an example in the Metropolitan Museum of Art in New York. Follow this link to see the original coif. Meantime here are some close up photos of the work.
A New Montero
This new pattern is based on an engraving in a drill book from 1642, The Military Discipline, published in London by Thomas Jenner. If you look closely the peak extends around the circumference of the cap, a style that I’ve noticed before. Thomas Lundsford’s cap in Come Friend Array Yourself also from 1642 is similar in construction, but in the Jenner engraving this feature is particularly pronounced and the pattern of stripes makes it obvious that it is a separate piece rather than a continuation of the crown. I’ve also straightened the curves of the top part of the folding skirt to match the image. The new cap isn’t any more comfortable to wear than the standard, and it takes a bit longer to make, but the tricky transition from peak to crown is a lot smoother with this new addition. Here are some more photos of the cap and the original image I copied.
The Long Coat is Finished!

It took a long time for the buttons to arrive, and also getting around to sewing the buttonholes (it has been a very busy summer!), but at long last the long coat is finished, and I managed to get Alan Mackinnon to take some nice photos of it being worn in action at the Siege of Chester last weekend. Thanks Alan.
A Jump Coat
This is the kind of project we really like, experimental, but combined with tailoring and designing clothes. It all started as an enquiry about what a “jump coat” might be. We were foxed, but on doing some research we realised it just might be a short coat. OED gave a few references to the later part of the century and some references on Early English Books Online suggested the same. Charles II is described as being disguised in a jump coat on his escape from the Battle of Worcester in 1651. I went back to the questioner and wondered why he was asking. It turned out he had some accounts that detailed the issue of kit to a regiment of cavalry throughout the war and in 1643, several of the associated dragoons were issued jump coats. Was there anything that might help decide what form this coat may take? I asked. There was! The tailors receipt listed per jump:
One and a quarter yards of broadcloth
Eighteen (or twenty) buttons
Tuppence of silk
Tuppence of thrid
Something to work with here. The silk we guessed was for buttonholes and thread obviously for construction. We also noticed that there was no mention of linen in any form to line the coats, but as several of the troopers (they are named in the accounts) also had doublets made, we thought that it would have been unnecessary to line the coat, though this would bring in additional difficulties, as the internal seams would need some form of binding to prevent the edges rubbing and the internal button fixings would be visible, though this was not a major problem.
What we did next was to cut a basic coat pattern to an average size and by placing the paper on a representatively sized piece of cloth, work out exactly how long you could make a coat given the quantity of wool used. This is what we came up with. The inner sleeve is pieced and the front body part is laid on the opposite grain, something that was generally not popular with 17th century tailors, but the experiment showed the maximum length possible using the cloth. if several coats are cut, it becomes possible to align all the body pieces along the grain and probably also to cut the sleeve pieces without piecing, though this isn’t strictly necessary.
A mock up was made in some spare wool and we found that the coat was well proportioned, but only reaching to the upper thigh. There was also enough to allow turn back cuffs on the sleeves and a collar, though interestingly very little left over to make cloth buttons should you want to.
So full steam ahead to make up some jump coats. Our client had become so enamoured of the idea that he decided to equip a small dragoon unit with the clothes in his accounts. Doublets had already been purchased, so it fell to us to make the coats. The wool was purchased, a blue broadcloth which it was believed had originally been the colour of the issue in 1643. As the purchased cloth was well fulled and easily able to hold a cut edge, the hems of the coat and the front edges were left raw. Inside, it was felt that the edges needed a tiny bit of help to prevent rubbing, so all the internal seam allowances were basted down, the stitches being visible on the outside. Eighteen flat pewter button were pushed through the wool down the front and secured with strong thread on the inside and worked thread bars sewn at the beginnings of the side and back vents, just to add strength and protection. The collar was folded and sewn with running stitches, the bottom edge also left as it was cut. There’s no need to fold it into a hem as it won’t fray.
The first coat had its first outing last weekend. The rest of the issue are nearly ready to ride, as are (hopefully) the dragooners!
A Ladies’ Neckerchief
This linen kerchief is based on one in the Platt Galleries on the Manchester City Galleries. Luckily for us the pattern is reproduced in Janet Arnold’s Patterns of Fashion 4 (page 102 to be exact) with a description of the construction of the neckerchief. In the book it is dated 1640-1650, so bang in period for the 1642 Tailor. The idea to make this came as a germ when discussing fine linen fabric and having secured a lovely piece of almost see-through cloth we decided that we ought to have a go at making something really nice.
The original kerchief is made in an approximate circle and edged around with buttonhole stitches that pick out a scalloped edge. It looked pretty simple, though probably a lot of work to finish as the seam edge was thick with sewing. The linen we were given was top quality, but as it turned out it was far too fine to take the kind of buttonhole stitches needed without disintegrating, so we decided to use a different linen for the edging, rather like added lace. We should have looked more closely at Janet Arnold’s pattern, because as it turns out, the maker of the original had used the same technique! The close up shows the pattern of the scalloping we used and the flat fell seam joining the edge.
So, just to crunch through the sewing of the edge. It took best part of twelve hours to finish the 110 inches needed in two
sections. This is also detailed in the pattern of the original, which has two breaks in the edge. This makes it easier to fold the kerchief double for wearing without creasing the edge.
Once the edge was finished, it was sewn to the main body of the linen using a run and fell seam. As Janet Arnold says, a few tiny tucks are necessary around the piece to help the straight strip fit the curve.
The kerchief is then folded double and placed around the neck, pinned in place and you are ready to go, like Hester Tradescant in this image from the time.


