Archive for March, 2014

March 31, 2014

Smocks (or Shifts?)

Screen Shot 2013-02-07 at 09.06.04The basic item of underclothing for a woman in the seventeenth century was the the smock, or shift. For a while the two names were synonymous, but by about 1660 the word smock faded out of use as it had become to have shady connotations. Whatever they called it, it was a long T-shaped garment, made of linen with sleeves, reaching down to below the knees. As with most linen garments of our period, the only surviving examples are of the best quality cloth and are highly embroidered. However, it’s probably safe to assume that the pattern was basically the same for everyone, although some portraits suggest that a low neckline would have been worn with lower cut bodices and perhaps with other clothes. It’s tricky to tell what is worn beneath a folded kerchief. The purpose was probably the same too, to protect the outergarments that would tend not to be washed as often from body oils and perspiration.

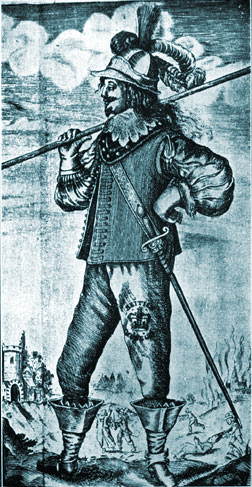
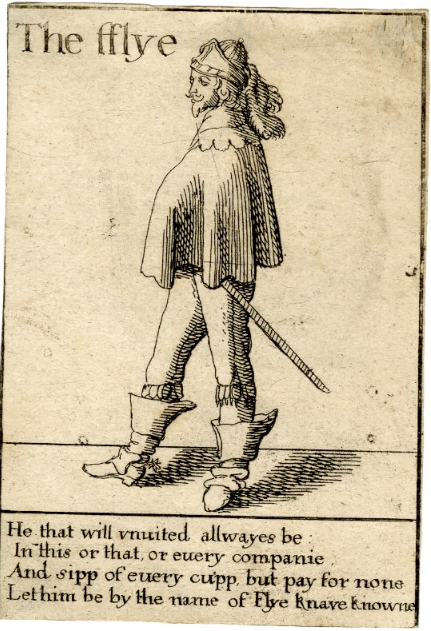
Picture left from A Juniper Lecture by John Taylor 1639.


Drea V&A smockThe extant smocks from the first third of the seventeenth century mostly have a standing collar, a single slit neck opening and long fullsleeves. Sadly there are none exactly datable to the 1640s, but these examples are a good guide to what was worn. This one in the V&A, picture from Drea Leed of Elizabethan Costuming is a nice one dated 1630 with a standard pattern and embroidered over the upper body. Much like a man’s shirt, they would be cut from a standard width of linen, anything from 30 to 36 inches wide. There is usually, like this example, a square gusset under the arms, but unlike a shirt there are either long triangular gores inserted in the sides or a looser cut to make the garment fuller and as such easier to walk around in. The V&A example also has a gusset inserted either side of the collar to provide strength.


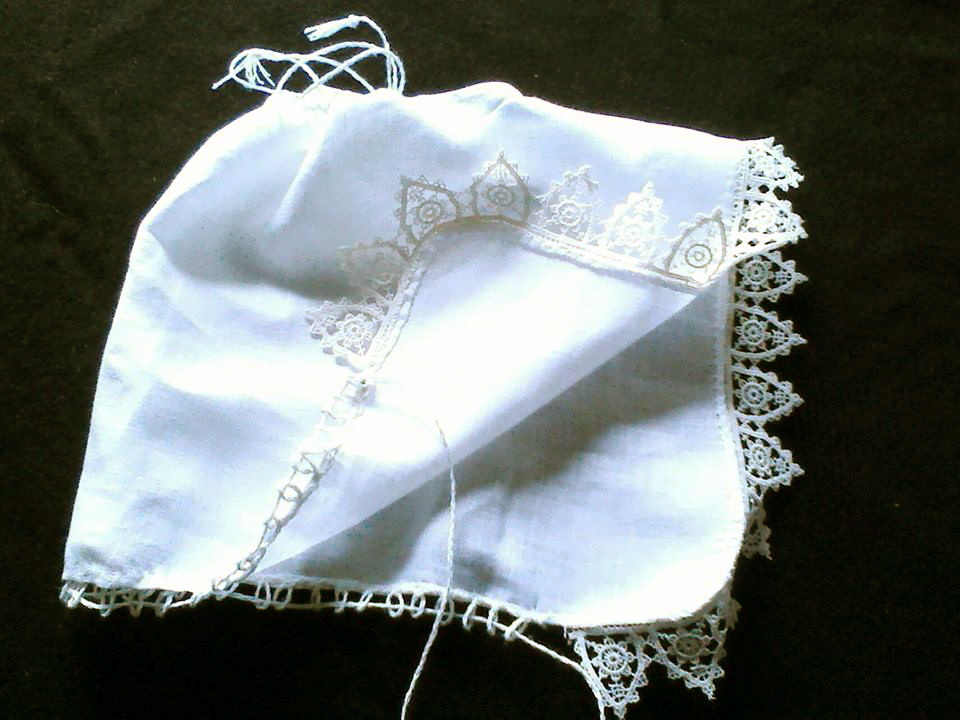
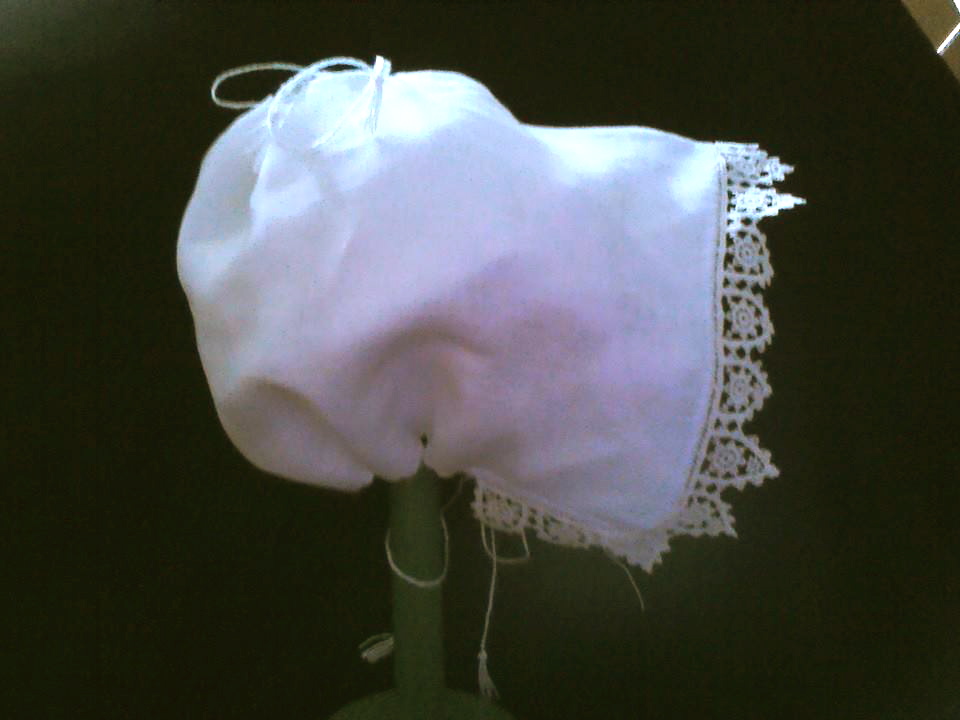
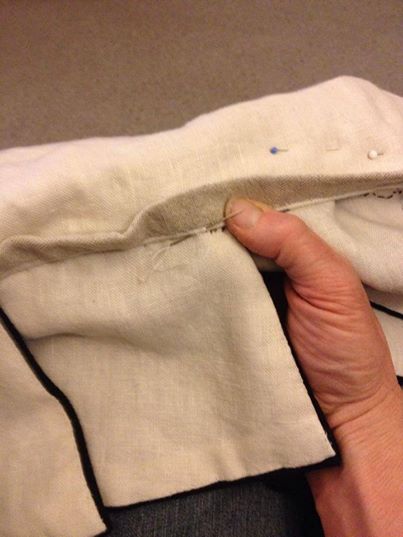
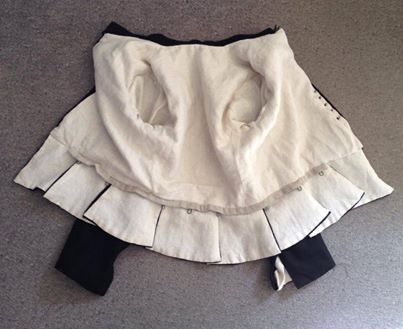
Here are two photos from the Bath Costume Museum showing a shoulder and underarm gusset. This is an early smock too, dated to 1610, but definitely the style still being worn in the 1640s.

neck gusset underarm gusset


A few really high status smocks have lower necklines that are gathered and tightly stitched onto a narrow neck band (not with a drawstring). This clears the neckline for an off the shoulder look, but these are really ornate with acres of fabric requiring such finely detailed needlework that they should be only considered the preserve of someone of serious wealth, not a common serving girl or army follower. All the museum examples have lines of embroidery, very similar to those on surviving men’s shirts which is no surprise really as both garments, in fact anything made of linen, was considered women’s work. The image linked here shows a portrait of a woman wearing a high necked smock


Mousetrap smock crop

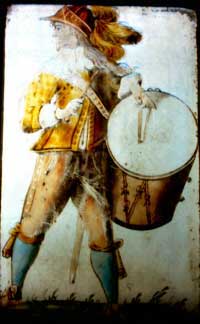
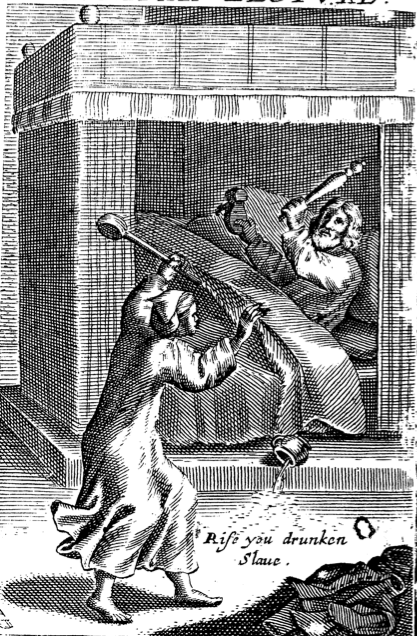
Smocks were worn both day and night. High class people may have had a separate night smock to change into, but it can be safely assumed that most common folk slept in the smock they wore during the day. Detail from Come Buy A Mousetrap. Pamphlet by Humphrey Crouch 1647


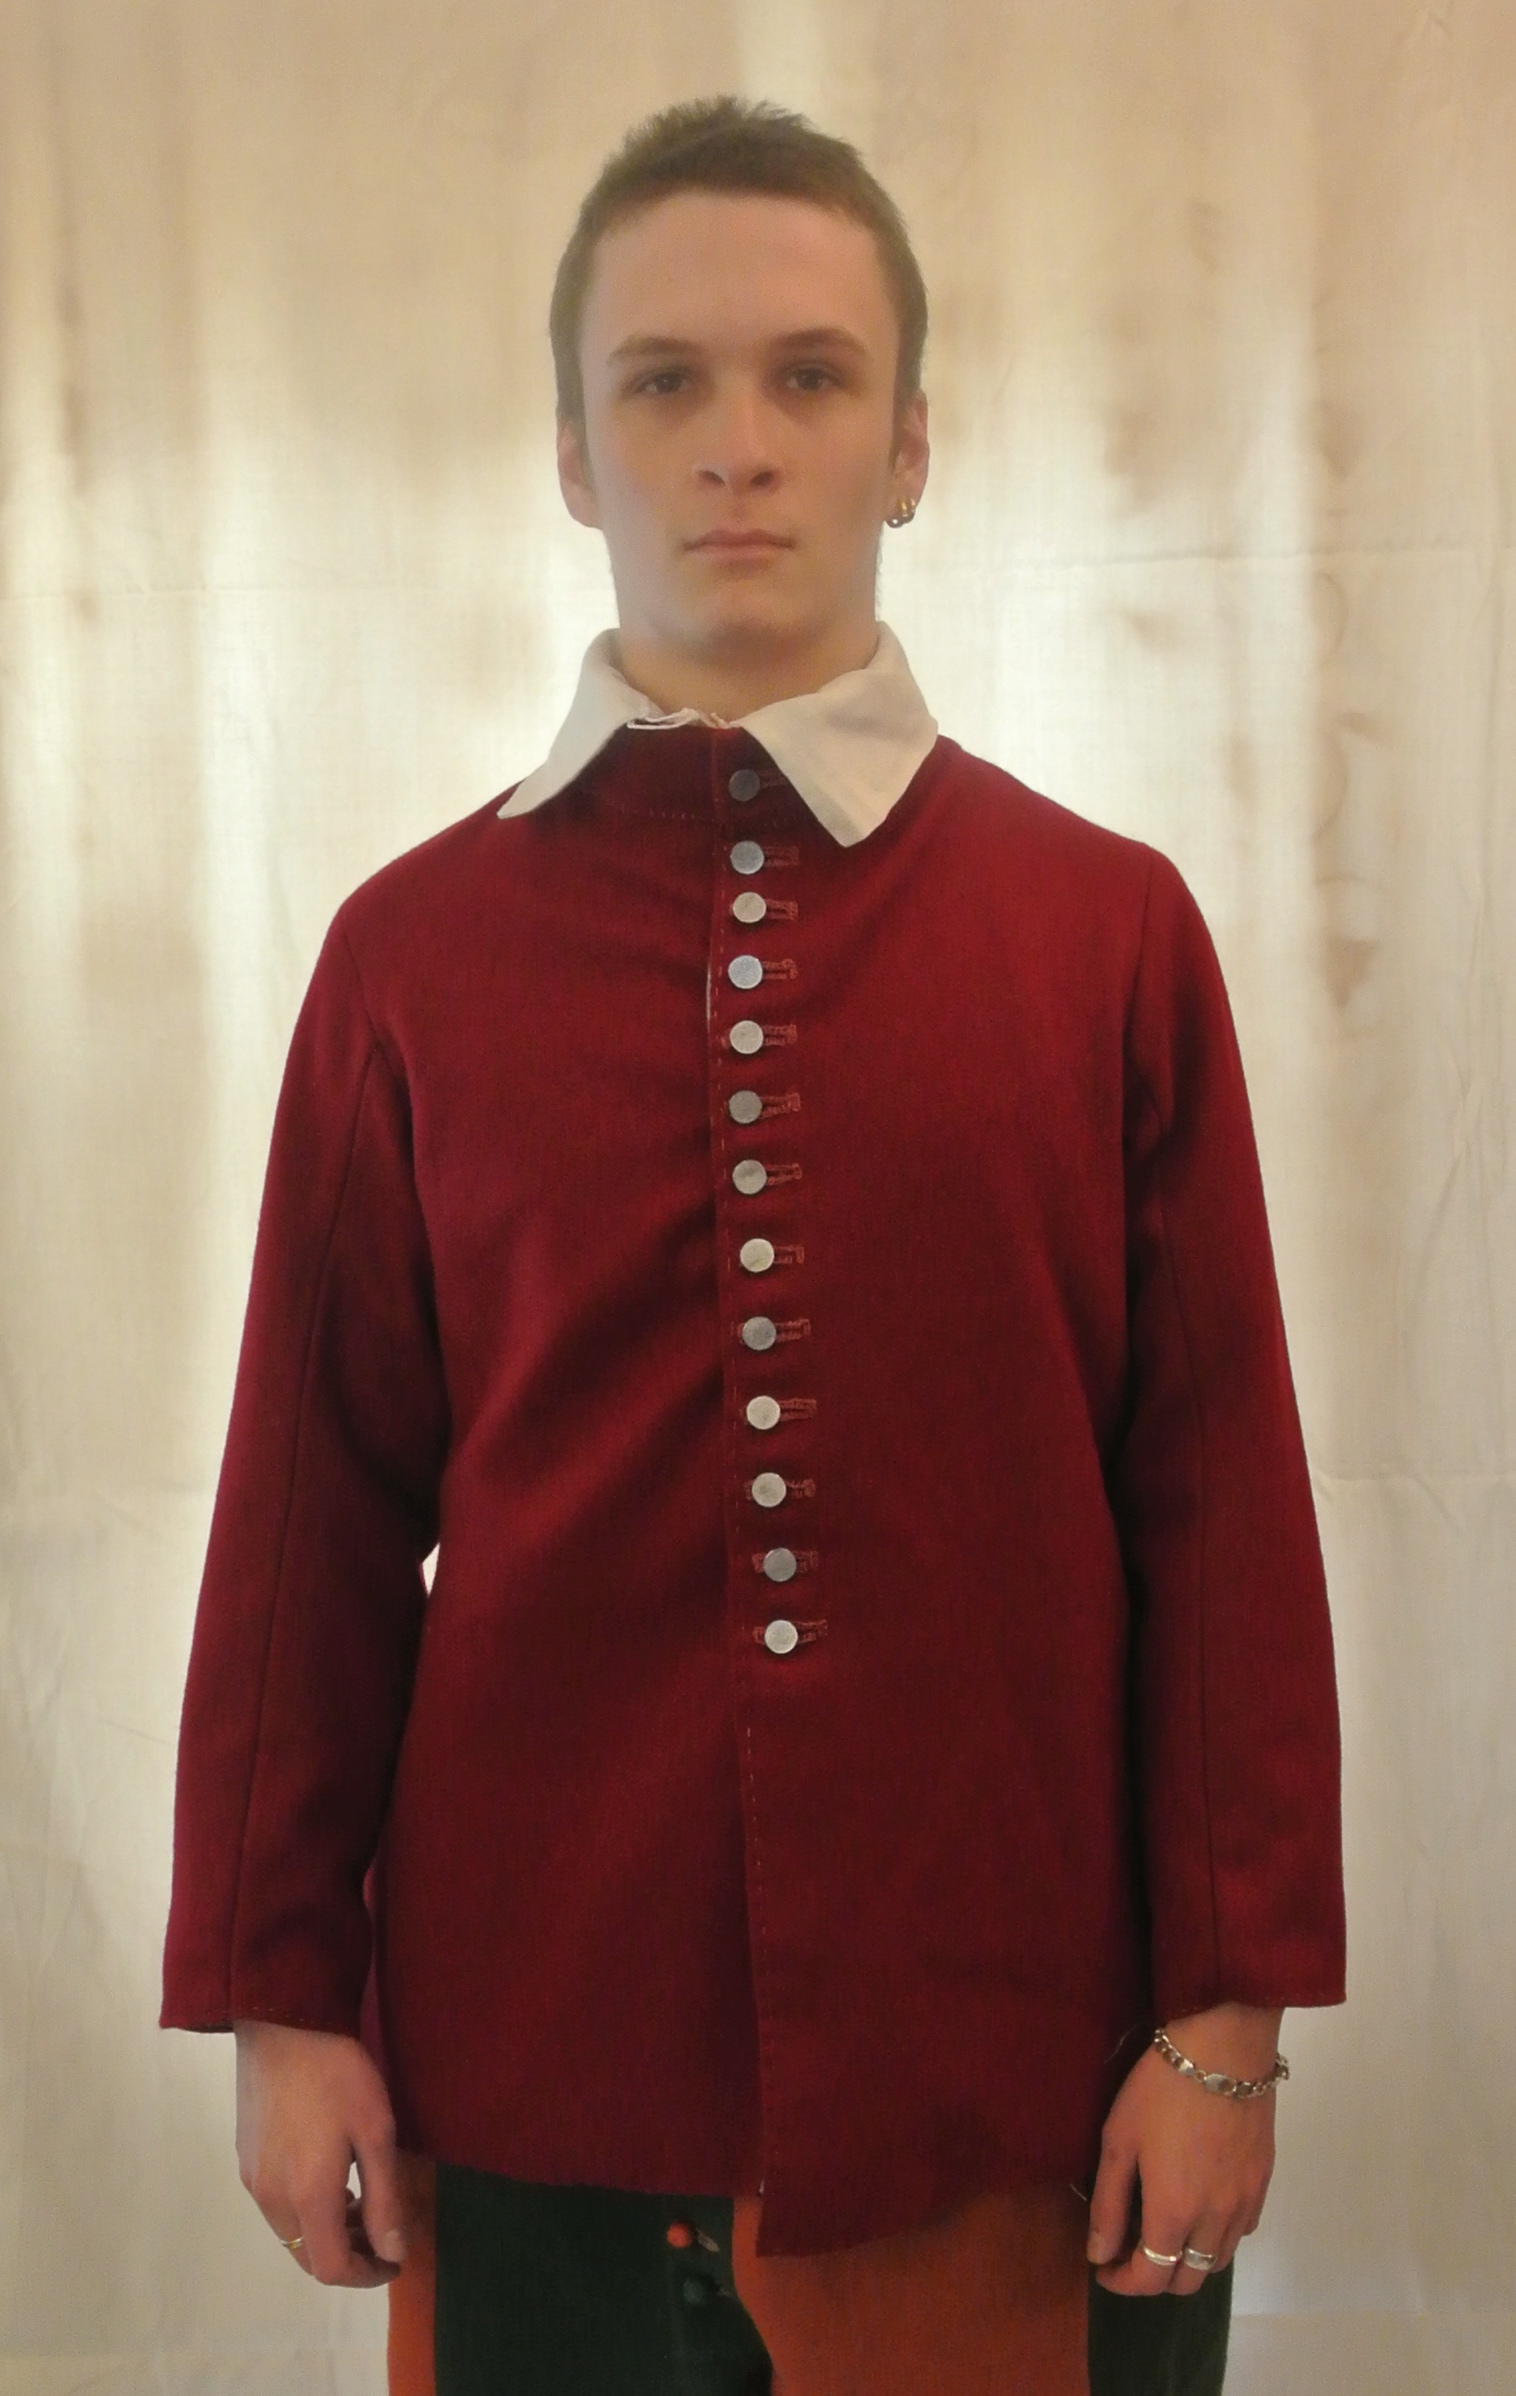
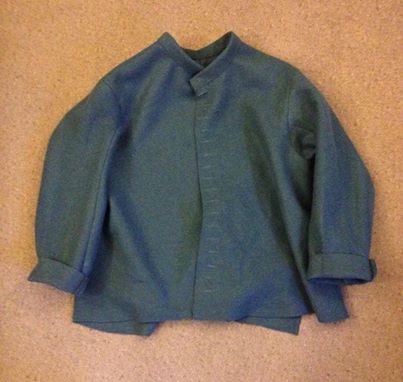
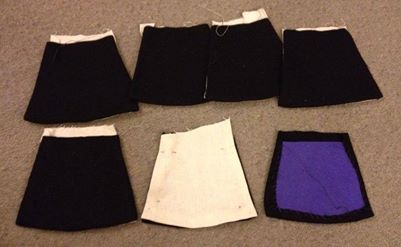
These pictures show two plain (in the sense of undecorated) reproduction smocks from 10155937_825891944091371_1708637714_n 1392025_825891914091374_423246871_n the 1642 Tailor. On the right with a high neckline and on the left with a lower, more scooped line for wearing with a low cut bodice.


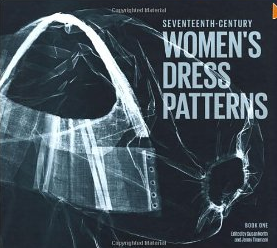
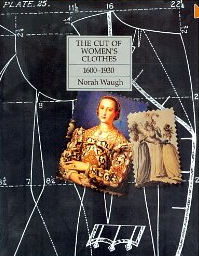
Recommended reading: Janet Arnold Patterns of Fashion 4

March 30, 2014

Montero Caps

Image
The Montero cap is like marmite, some people really like them whilst others don’t. There are very few references of monteros being worn, and even fewer images that can reliably be set in England in the 1640s. Montero above by The 1642 Tailor

In Magnalia Dei Anglicana. Or Englands Parliamentary Chronicle

By John Vicars, published in 1646, this story relates how Prince Rupert was mistaken for Thomas Fairfax in the heat of battle because they were both wearing similar monteros:

“And, heer (as wee have it from credible relation) a party of the enemies brake through our left wing of Horse, came quite behinde our Rear of our Train, the Leader of them being a person somewhat in habite like our Generall, in a red Montero, as our Generall had; Hee came as a friend, and our Commander of the guard of the Train went with his hat in his hand, and asked him how the day went, thinking verily hee had been our Generall; The Cavalier (who wee since heard for certain was Rupert) asked him and the rest, if they would have quarter, whereupon, they cryed no, gave fire instantly, and most bravely beat him off, making him flie for his life, and his companions.”


And in this account by Anthony Wood from his diary for 1643 in Oxford there are details an issue of suits and montero caps:

“all the common soldiers then at Oxford were new appareled, some all in red, coats, breeches and mounteers; & some all in blewe”

It is thought that the origins of the Montero were on the continent and that it was a hunting hat, as the Oxford English Dictionary says:

“A cap of a type formerly worn in Spain for hunting, having a spherical crown and (freq. fur lined) flaps able to be drawn down to protect the ears and neck”. It would be a practical hat for hunting, the folded skirt of the cap would be practical in cold weather and the design also catches less wind than a broad-brimmed hat. It may also have been a higher status item than reenactors tend to portray, though as we have seen, there is at least one recorded instance of an issue to common soldiers.

Screen Shot 2014-03-30 at 13.14.32Unfortunately no one really knows for sure what a montero actually looked like as there is no extant image that is labelled “here is a montero”, though there is a sketchy drawing in a The Academie of Armourie published by Randall Holme in 1688 (left) which gives us a few clues as it is  labelled as a mountaro in the text. There are several images from the continent of Screen Shot 2013-02-07 at 19.14.47soldiers wearing caps that could just fit the bill, with triangular panels making the crown, some with peaks but all having a band around the crown that could be folded flaps. This detail from a painting by Pieter de Snayers of Troops at the Siege of Aire Sur la Lys from 1653 shows a pikeman with an unfolded cap.


thomas-lunsford monteroThere is one engraving from England of Colonel Thomas Lunsford wearing a cap with a peak andLunsford big crop a low rounded front, very much the classic reenactor’s montero. Notice how thin the folded skirt is as it goes around the cap and the fact that you can see the lower edge of the crown beneath the skirt. Attaching the skirt in this way makes a big difference to the fit of the cap compared to just sewing it to the bottom of the crown. This is how I originally thought they were made, but looking at this and other images from the continent proves otherwise and I have born this out by practical experiment that a montero made this way is much more comfortable on the head.


SunplusPiquierettambour (drummer montero)In Farndon Church Cheshire there is a stained glass window showing a group of soldiers from the civil war. The drummer appears to wear a red peaked cap with gold trim. This could be another Montero, but what is interesting is that the pose and costume of the drummer is very similar to the French engraving shown here by Abraham Bosse. The montero shown below is based on this picture.


1962693_617730188297420_314582442_n


Screen Shot 2013-02-07 at 19.20.19 envy montero cropjpgThis design may also be a Montero, except that there is no peak. These two images, one a Hollar engraving, the Fflye from a Pack of Knaves, the other by Abraham Bosse, on the left entitled Envy, both show a peakless cap with piped seams or maybe braided decoration to the crown, which is made of more panels this time, maybe 12 or so and a folded band that comes to a point in front like the drummer’s one. The left hand image also shows the folding of the band. The detail does show also that the band is sewn together at the front, a clue a to how these caps were probably made. Both have a button on the top that covers the tricky part of the crown where the seams meet, and piping around the edges that keep the raw cut wool from too much fraying,though I’ve found that a good fulled broadcloth does’t actually need hemming


This is  a photo of two of my reconstructed monteros, one folded and the other unfolded. I’ve tried to keep the gap that is seen in the engravings IMG_1428between the skirt and the edge of the crown, and extended the sides of the peak to meet the crown as seen in the Lunsford portrait. The cut edges are left raw which is a period technique and results in a more comfortable hat because a lot of layers can be dispensed with in the construction. It works as a cap, is comfy and looks like the pictures.


1619313_730278613651690_632417213_nAnd now a third example, my best take on the peakless Hollar Fflye montero. Twelve panels in the crown and all seams are piped, just like the engraving. There is also a button on the top as all those seams tend to create a hole in the top where the rain could come in!


Banner image courtesy of Rusty Aldwinckle. Most of the other photos were taken by me.

Tags:
March 22, 2014

Soldier’s Coat

DSC_1794

DSC_1784_2

The general style is high-waisted with a standing collar though there were other varieties and civilian coats were also worn in the ranks at times. It could have one or two-piece sleeves, and in the second case, the back seam could be left open for a few inches to provide a turn-back. Top of the sleeve wings are not a necessity either, they were the fashion for doublets, though not always seen on soldier’s coats. They may however have provided additional shoulder protection for carrying muskets or pikes on the march. Coats were closed with buttons, closely spaced down the front to run from collar to waist. Twelve buttons is a minimum and the coat would be buttoned to the neck. You can go for cloth or metal, flat or spherical are all ok, though thread wrapped ones may just be a tad too high quality. Picture on the left and above of a coat by The 1642 Tailor.

There are also several schools of thought as to exactly how the coats were cut. One conjecture is that they were sometimes made by unskilled tailors and a pattern was developed to cater for a low level of skill and equipment that involved a squared off pattern that could be torn from the cloth rather than cut. I guess all kinds of patterns were used, the slightly tailored one being my favorite as it is seen in several images from the time, but the square cut, quick fix pattern has the advantage that it uses less cloth, although it’s a moot point about the unskilled tailors. Most if not all the images seem to show a more tailored coat with flared skirts. This link will take you to a variety of pictures from the period.


1800310_613752678695171_750087819_nIt is possible however to cut a more stylish coat without wasting too much cloth. This image shows a mock up coat made from one and a quarter yards of broadcloth, an amount found in several records of army issues. It’s short, reaching to just below the thighs and I found that there wasn’t even enough left to make a few cloth buttons with the waste. This coat, referred to in the records as a jump coat is also unlined and should be fastened with 18 or 20 buttons.


IMG_0642Having tried several methods of making coats, and looking at an original in the Colchester Castle Museum, I now believe that the best and quickest method, which would involves using fabric for the shell that is fulled enough so that it holds a cut edge. On this coat (left), the lining was turned in but the wool edge left raw as it was cut. This is common in coats from the late 17th century and was probably used in the 1640s, and though no extant examples have been identified, it is a good assumption that it could have been used for Civil War coats. Using this type of fabric it is entirely possible to construct the garment by layering the fabrics and oversewing the two together with only a running stitch. DSC_1739The sleeve tops and collar edges would need turning in and the top of the open seams between the tabs would have to be strengthened with extra stitching but the rest could be left raw, even the lower collar edges, leaving little that needed to be turned in and no extra seam allowances. This method also works with montero skirts and peaks. The photo shows a detail of the collar edge and opening of the coat worn at the top.


Issue coats were also much more likely to have been made in batches rather than job lots. A tailor contracted to DSC_1866make a thousand coats for an army would have to subcontract and thus even a bulk order such as for the Oxford army or the army that went to Ireland would be made up of a wide spectrum of cuts and colours as separate bolts of cloth would be used by different tailors who probably also had their own favorite pattern. If you were part of a militia or a trayned band you may have had an issue coat or you may just have worn your own clothes. In this case your top layer would either be a plain Soldier’s coat or perhaps a more tailored doublet, see right.


Selecting what colour coat to wear in reenactment is much like choosing the length of a piece of string.

There are references to coats being issued to soldiers. For instance Oxford regiments were given coats, breeches and montero caps in 1643, so if you were an Oxford royalist in July of that year you would wear a nice new red or blue coat, though not necessarily a well fitting one as uniform issue clothes have never been made to fit.

Screen Shot 2013-02-12 at 08.55.47The red coats would fade rapidly on campaign, the blue ones less so but maybe after only a month or so in the field they would probably be considerably the worse for wear, so the same Oxford royalist half way through the year would wear a coat of a shabby quality that may take several years of reenacting to achieve as this chap from Fairfax’s regiment shows. Picture on the right by Chris Thomas.

For example Hampden’s regiment in the parliament army started in 1642 with issued green coats with yellow linings. By spring of the following year the coats were faded and patched, and as the yellow in the green dye would fade faster than the blue, they would have looked more like a blue-coated regiment. Up until the autumn when a new issue of grey or red coats was made, their clothes would possibly have been supplemented by some civilian doublets. By 1644, having gone through several more changes they would have been in red coats and breeches! Quite a range to choose from should you want to represent this regiment, but not uncommon in long lived units throughout the war.

(info from Common Soldiers Clothing by Stuart Peachey and Alan Turton)


Thus the big problem is that civil war soldiers were not uniformed or regimented in their dress in a way that modern troops are, and as I have described, the coats varied widely even from season to season, so for a particular company or group in reenactment you have to decide the period you are presenting and how to portray the effect that campaigning would have had on the clothes whilst presenting some kind of unified whole.

Hopton2


The picture here shows one solution. The soldiers were issued with authentically dyed uniforms that have faded over time. The blue ones become almost grey in hue, whilst red becomes pale also. The fading is uneven in places, shoulders and sleeve tops for instance losing colour more quickly than the underarms. There are batches of uniforms evident here. Some coats being newer are less faded, producing a parti-coloured effect that may replicate the Oxford army in issued coats, having been in the field for a few months. This photo by Chris Thomas are of Lord Hopton’s, a  regiment of the King’s Army.

March 20, 2014

1640s Shoes

Men's shoe

The shoe that was worn most by Civil War soldiers is widely known as the latchet shoe, though as far as I can tell, in the 1640s they were just called ‘shoes’. The word refers (naturally if you think about it) to the laces, as this quote from a book by the independent divine Henry Burton printed in 1640 shows:

“The Iewes would not so much as stoop to tye the  latchet of their shooe in the place, where an Image was, least their bowing might seem to be to the Image.”

Shoes may have been issued in their thousands during the wars, ideally three or four times a year, possibly in one of four sizes, which is a clue to the reason they had open sides. A closed sided shoe might seem more practical as it keeps the weather out, but the open sided style is better able to fit a variety of foot shapes, arch sizes etc. as it has a built in adjustment. There are good original illustrations of the kind of basic shoe I’m discussing here and here. The shoes shown above are the ones I wear, made by Sarah Juniper

When you are looking for shoes what you should first consider is exactly the same thing you would for modern shoes. Do they fit? TheyScreen Shot 2013-03-07 at 11.15.07 won’t wear in, they will not stretch, two pairs of socks are not really an option. Shoes will fit or not, some people chose to ignore this but a good seller would rather not sell bad fitting footwear. The sketch on the right shows the main parts of a 1640 style shoe. Drawing by Tod Booth of Re-enactment Shoes

Things to check with off the peg shoes:

Is the shoe made of leather? It sounds obvious but there are synthetic ones.

Is the stitching good or loose?

Does the seller offer a guarantee?

Are they knowledgeable about shoes or are they just a reseller?

Does the shoe feel like it flexes as you walk? If the sole doesn’t flex the upper will stretch and you will get a loose shoe and blisters.

What you need to look for first in a good quality latchet shoe is sturdy all leather construction. A hand made shoe has butt stitched side seams, whereas a machine made example will generally have overlapping seams. There are no inherent problems with non hand stitched shoes, but there are some pitfalls to avoid. Try to find a pair that has a reasonable thickness of leather, rather than multiple layers, and pay attention to the side seam positioning as this is an easy mistake to make in construction and can result in an unhistoric style

.

Screen Shot 2013-01-31 at 14.43.39This is a picture of an actual 17th century open sided shoe from a book called The Romance of the Shoe as far as I can work out and is ideally what you should be looking for. Although this is not a cheap option, a well made pair of latchets should last you a long time if they’re looked after. The square toe isn’t necessary, in fact most shoes of the period had round toes and the theory is that they were more sturdy and harder wearing than square toed examples. The side seam is level with the fastening and also notice the shaping around the heel.

DSCF0480DSC_1863

Here are two more repro shoes, both by Chris Thomas. On the left a pair made for a lady, though note there’s no real difference to the men’s shoes above and on the right a more practical close sided shoe that may be more suited for a labourer. As we have discussed, the more open sided shoe was probably more likely to have been army issue as it has a certain amount of size adjustment built in, but this style would be more weather-proof. Notice still that the side seam is more or less in line with the front of the heel.

This guy is a detail from the Shepeard’s Oracles by Francis Quarles, published in 1645. He’s wearing low heeled shoes with large side openings.

Screen Shot 2013-02-08 at 09.04.12

Screen Shot 2013-02-08 at 08.15.47

Follow this link to a variety of images that show shoes being worn from the period.

And two pictures that show either end of the shoe spectrum. A pair of flat shoes worn by a melon seller from Cries of London 1654 and the King’s heeled shoe from the fronticepiece of Eikon Basilike.

Screen Shot 2013-03-04 at 09.55.00 Screen Shot 2013-03-07 at 09.29.48

March 19, 2014

Good Reads

Here are a selection of books that you should read if you are interested in making your own clothes.

Screen Shot 2015-01-28 at 11.05.49The Modern Maker Vol 1by Mathew Gnagy. How to make a doublet in the old way from scratch. I’ve posted a review elsewhere on the blog. Follow this link

Seventeenth-Century Women’s Dress Patterns: Bk. One by Susan North and Jenny TiramaniScreen Shot 2013-02-08 at 11.36.13

A selection of clothes held in the V&A dissected inside and out with photos, x-rays, patterns and sections on techniques. Highly recommended.

Seventeenth-century Women’s Dress Patterns: Book Two: 2 by Susan North and Jenny TiramaniScreen Shot 2013-02-08 at 11.37.06

Book two is not as relavant to the 1640s, but still the same high standards and essential reading if you’re planning a set of bodies.

Seventeenth and Eighteenth-Century Fashion in Detail by Avril Hart and Susan NorthScreen Shot 2013-02-08 at 11.37.28

No patterns here but some super close-up photography of some lovely clothes from the V&A Museum

Sarah Thursfield’s Perfect Linens

If you want to make shirts and smocks, you need this book. It covers medieval to 19th century, and has all the necessary sewing and stitching instructions. You can buy it directly from Sarah. http://www.sarahthursfield.com/Trade.php

The Cut of Men’s Clothes by Norah Waugh

Screen Shot 2013-02-08 at 11.37.43

The Cut of Women’s Clothes by Norah WaughScreen Shot 2013-02-08 at 11.37.54

Both books are essential reading, even though they are nearly twenty years old. Expensive, but your library will have copies and the Cut of Men’s Clothes in available online as a pdf.

Patterns of Fashion 3: (1560-1620) by Janet Arnold

Screen Shot 2013-02-08 at 11.38.08

Patterns of Fashion 4: The cut and construction of linen shirts, smocks, neckwear, headwear and accessories for men and women c. Screen Shot 2013-02-08 at 11.38.191540 – 1660

Janet Arnold

Janet Arnold set the benchmark for examining remaining garments and publishing the patterns. Both these books are excellent, though strictly very few of the patterns are from the 1640s.

The Tudor Tailor: Reconstructing Sixteenth-Century Dress by Jane Malcolm-Davies and Ninya MikhailaScreen Shot 2013-02-08 at 11.38.32

Another excellent book that draws on the lineage of Janet Arnold and takes it a step further. The patterns are not relavant to the mid-seventeenth century, but all the techniques described are. Well worth the money. I’ve been bugging Ninya for years to write the Stuart Tailor. We should start a petition!

Lions of Fashion – Male Fashion of the 16th, 17th, 18th Centuries by Lena Rangström. 

Screen Shot 2013-02-08 at 11.47.15

the entire collection of clothes, including some plainer well-worn items, from three centuries of the men of the Swedish royal family, and the quality of photography is mind-blowing. According to Amazon, it seems to be out of print, but order it from your local library today!

Pattern Cutting for Men’s Costume by Elizabeth Friendship This is really good if you want to make your own patterns. I use it constantly for doublets and coats.

Screen Shot 2013-02-08 at 14.21.56

Screen Shot 2014-03-19 at 10.18.18

Creating Historical Clothes: Pattern Cutting from Tudor to Victorian Times. This is also by Elizabeth is this companion volume for Women’s clothes. It’s recently out and easier to source than the men’s one which seems to have become rather scarce.

Last, but definitely not least, Stuart Peachey has a myriad of small books on common clothes of the period. The new series derives from 5 years of research into original sources. It’s highly recommended for anyone interested in getting it right, though most of the clothes are from pre 1640 and the patterns don’t have quite enough explanation if you are new to making your own clothes. However, Stuart and Gilly will always help if you get stuck. There are thirty titles to come eventually! Spot Stuart at reenactment fairs, or via this weblink which lists all the new titles and when each one will be available. They are nealy all out at time of writing, including the new sexily glossy, rather oddly named users manual. Haynes for the 17th century?

photoScreen Shot 2014-03-19 at 10.28.56

March 18, 2014

Drawers

For the serious reenactor who eschews the wearing of boxers, budgie smugglers or even Y-fronts beneath his (or her) breeches, there are two choices: go commando or invest in a pair of drawers. Now we all know what we are talking about here I assume, baggy old pants with a tape tie or drawstring to hold them up. The kind of thing we all imagined Norah Batty wore above her wrinkled old hose. Well maybe yes, but also maybe no. The estimable Mr Peachey has done some digging in the vaults and emerged with a new theorem that you can investigate further if you invest in his new book Male Drawers, Linen & Aprons, Volume 17 of the new series.

He has found, as I did that searching for references to drawers is tricky as there are several meanings for the word. It Screen Shot 2014-03-18 at 16.22.55could mean wooden drawers, a pillowcase, an occupation (wire drawers) or an item of clothing. There are some references to russet or cotton drawers which may be a form of over breeches and several that mention night drawers for use in bed. In fact there are very few real references to the use of drawers that we would recognise, leading to the thought that they weren’t really worn at all by common folk in seventeenth century England. I would like to differ here, I feel here are enough references to indicate this was at least worn by some and there are actually a few images that show what they looked like. In this picture from 1647 showing an Anabaptist baptism ceremony, the two participants are wearing what look like linen drawers.

Furthermore, this reference from  Londons wonder being a most true and positive relation of the taking and killing of a great whale neer to Greenwich from 1658 is very plain about what was being worn:

“UPon the third of June this present year 1658. a huge whale came swimming up the Thames and was first seen by a boy at black-Wall being of a mighty bulke and bigness, which something frighted the boy to see such a Monstrous fish: the boy presently revealed it to some Water-men thereabouts, who instantly got Harping-irons: Spits, Hatchets, Bills and Axes, & fell a striking the Whale as far as they durst venter. The Water-men stripping off their Doublets and Breeches, and went only in their Shirts and drawers to be light and nimble at their worke; and to escape the danger of drowning in case the Whale had over-turn’d them, they struck the Harping-irons all at one time into her body, but she quickly remov’d them out again.”

It has been suggested that this suggests that drawers were only worn by sailors and watermen. What is does show is that drawers were worn beneath the breeches and that they were not restrictive in any way.

Here are a couple of photos of drawers made by the 1642 Tailor. The pattern is based on an extant pair examined by 1976911_620413088029130_1160654359_nJanet Arnold and printed in her Patterns of Fashion 4. In this case we went for tapes sewn to the edges rather than drawstrings and an opening fly as on the original. There is another possibility for no fly and a drawstring, but that just sounds a tad too impractical to me. The pair on the right are decorated with blanket stitch in red linen thread outlining the run and fell seams.1620958_611356438934795_758705088_n

Tags:
March 18, 2014

Buttons

Buttons

Screen Shot 2013-02-01 at 09.18.3017th century buttons were not pierced with two or four holes like those generally used now. Instead they had a shank on the back of the button, and the single attachment hole passed through that.

The picture shows a typical 17th century pewter button on the portable antiquities site. Metal buttons were common, often made from lead, pewter tin or alloys of the same. These were usually cast, and the shank could be formed as one piece with the button, or could be in the form of a twist of copper alloy or iron wire set into the casting. Metal buttons could also be made from copper alloy, either cast as here, or in the case of flat buttons, punched from sheet with a loop soldered on the back.  Buttons could also be made from wood, bone etc, but these styles were also shanked not pierced. Upper class buttons could be in silver, gold, or precious stones.

Screen Shot 2013-02-01 at 08.56.08

Screen Shot 2013-02-01 at 09.01.15

Another style of button used a core, often of wood, covered in a wrapping of threads. The threads also formed an attachment shank. They could be fairly plain and simple, or use expensive silk or silver and gold thread. The plain example on the left is attached to a possibly 17th century coat in Colchester Museum, and is wrapped in linen thread. The right hand example from the Museum of London, a doublet from the Isham Collection. This is silk and metallic thread wrapped.

Cloth Buttons

Cloth buttons were also common: formed from scraps of cloth, or a wooden core, wrapped in a piece of cloth, these also had a shank formed by binding and stitching. None have survived as far as I know, but here is a row of buttons on a reconstructed soldier’s coat.

Here’s a link to a nice piece about how to make your own thread wrapped and cloth buttons and another here

Two more original examples of thread wrapped buttons. The left hand button a detail from a boys doublet in Abingdon Museum. This button has been wrapped in a chevron pattern. The right hand picture is of an embroidered linen doublet in the Manchester Costume Collection in Platt Hall. The wrapping here starts with 5 or 6 guide threads around which the rest of the thread is anchored. Notice on both buttons that there is a centre knot. This is the top end of the anchoring threads that pass through the fabric of the doublet and form the shank holding the button up.

Screen Shot 2013-02-01 at 09.14.38Screen Shot 2013-02-01 at 09.03.09

These buttons on a doublet in a museum in London have lost some of their top threads, showing how they were made, satin wrapped threads around the bead and embroidered over the top.

DSC_1472

Have a look at this portrait of Nicholas Lanier. The knots on the top of his buttons can be seen clearly.

And here are some more examples of nice reproduction buttons.

Screen Shot 2013-02-01 at 08.58.20

Silk wrapped ones for a rather garish costume at Shakespeare’s Globe by Karl Robinson

10676400_10203103062953043_8274216368324318834_n

Linen thread wrapped one by the 1642 Tailor

Metal buttons

Reproduction pewter buttons on a soldier’s coat from Christophu

Screen Shot 2013-02-02 at 09.27.59

And last, but by no means least, some chevron wrapped ones by Gina Barrett

March 12, 2014

Ladies’ Coif

I set our goodwife the task of making a coif for display. She chose one from Janet Arnold’s Patterns of Fashion, number fifty one in the book, dated 1600-10, but still ok for 1640s we reckon. The original is in the Museum of Costume and Textiles in Nottingham and features strings that run through embroidered loops so the coif can be adjusted to suit a variety of hairstyles (according to Janet Arnold)

Here is the result. The original is embroidered, though that would be a bit old fashioned for the civil war period and 999950_627507820652990_401847792_n 1924624_627507843986321_956204083_n trimmed with a narrow needle lace. We chose Tudor Tailor lace and a plain linen. Barbara sewed every stitch by hand and made the loops & strings


It lookedIMG_20140312_145137 a bit odd on the stand, perhaps a bit too baggy at the back, but we found when the needle woman tried it on that it does fit and the adjusting strings do provide the necessary adjustment as the book suggested. There are other ways of wearing a coif, braided hair will provide an anchoring point to tie the strings round for example, though this style seems to work well without. For further info, check the link to ECW Resources page

March 10, 2014

A Drummer’s Montero

Just a few pics of a work in progress from a week or so ago.I may give away some of my secrets here, so don’t spread them around please!


The brief was a red montero with a pointed front skirt and 1794522_615542231849549_1374306424_ngold braid. The braid comes from Morocco and is just gold wire braided into a cord, more 1640s than all the russia braid that you see in the haberdashery stores which was an 18th century adornment. Here’s a photo of the newly finished and decorated crown.


The next stage of making the hat is to sew together the crown, lining and peak together using the linen strip that will become the internal band of the hat. I have no idea whether 1640s caps had this internal band, but I’ve found it adds to the comfort of the hat and finishes the bottom edge off in a neat though still properly period manner. Here’s the seam half-way 993027_616460385091067_150874468_nfinished. It all looks a bit scruffy really, but all the internal workings disappear when the cap is finished.


One this seam is done, all the excess fabric is cut away, leaving as small a seam allowance as I dare. The next photo 1620527_616479178422521_1451552875_nshows the crown and peak finished, just waiting for the skirt to be fixed on. From this stage, all that needs doing is the skirt to be sewn to the outside of the crown, maintaining a half inch or so between the bottom edge of the crown and the skirt and then whipping down the internal band to hide all the scruffy inside seams. Voila!


1962693_617730188297420_314582442_n


March 6, 2014

Sewing the Doublet

Actually, like a fool I forgot to take too many photos whilst I made up the doublet. I did lay out the tabs before I put1939902_619718428098596_268017672_n them around the waistline. The fabric is quite fine, so I layered the tabs with a piece of broadcloth inside each one, wrapping the outer black wool around the inner and then whipping the linen lining to the inside.

The next picture is a close up of the finishing off under the girdle stead that neatens the edge between the body 1779731_620663798004059_2145840138_nlining and the tabs. It all gets covered up by the girdle stead strip. This is where the eyes will be sewn when the thing is finished

Here are two pictures of the (nearly) finished doublet showing the inside and outside views. I need to finish four buttonholes and the doublet is done.

1922249_623844901019282_1505510927_n 1797479_623869144350191_1667274543_n